Ipad Pro mockups
If you are selling digital products like planners, journals, stickers, lettering etc., chances are you need to showcase your designs beautifully. They need to look professional in order for people to buy them. It’s not enough to have a great product anymore, it has to be presented great too.
The mockups also will be a nice fit if you are a digital planner/ bullet journal enthusiast. If you want to showcase your spreads on social media and grow your audience you have to stand out.
If you are blogger and write about digital products or Ipad apps, mockups will work great as hero banner or post cover.
Now, let’s take a look on how easy it is to place your screenshot and edit the mockup.
For Photoshop users:
When you open psd file, you’ll see 3 layers.
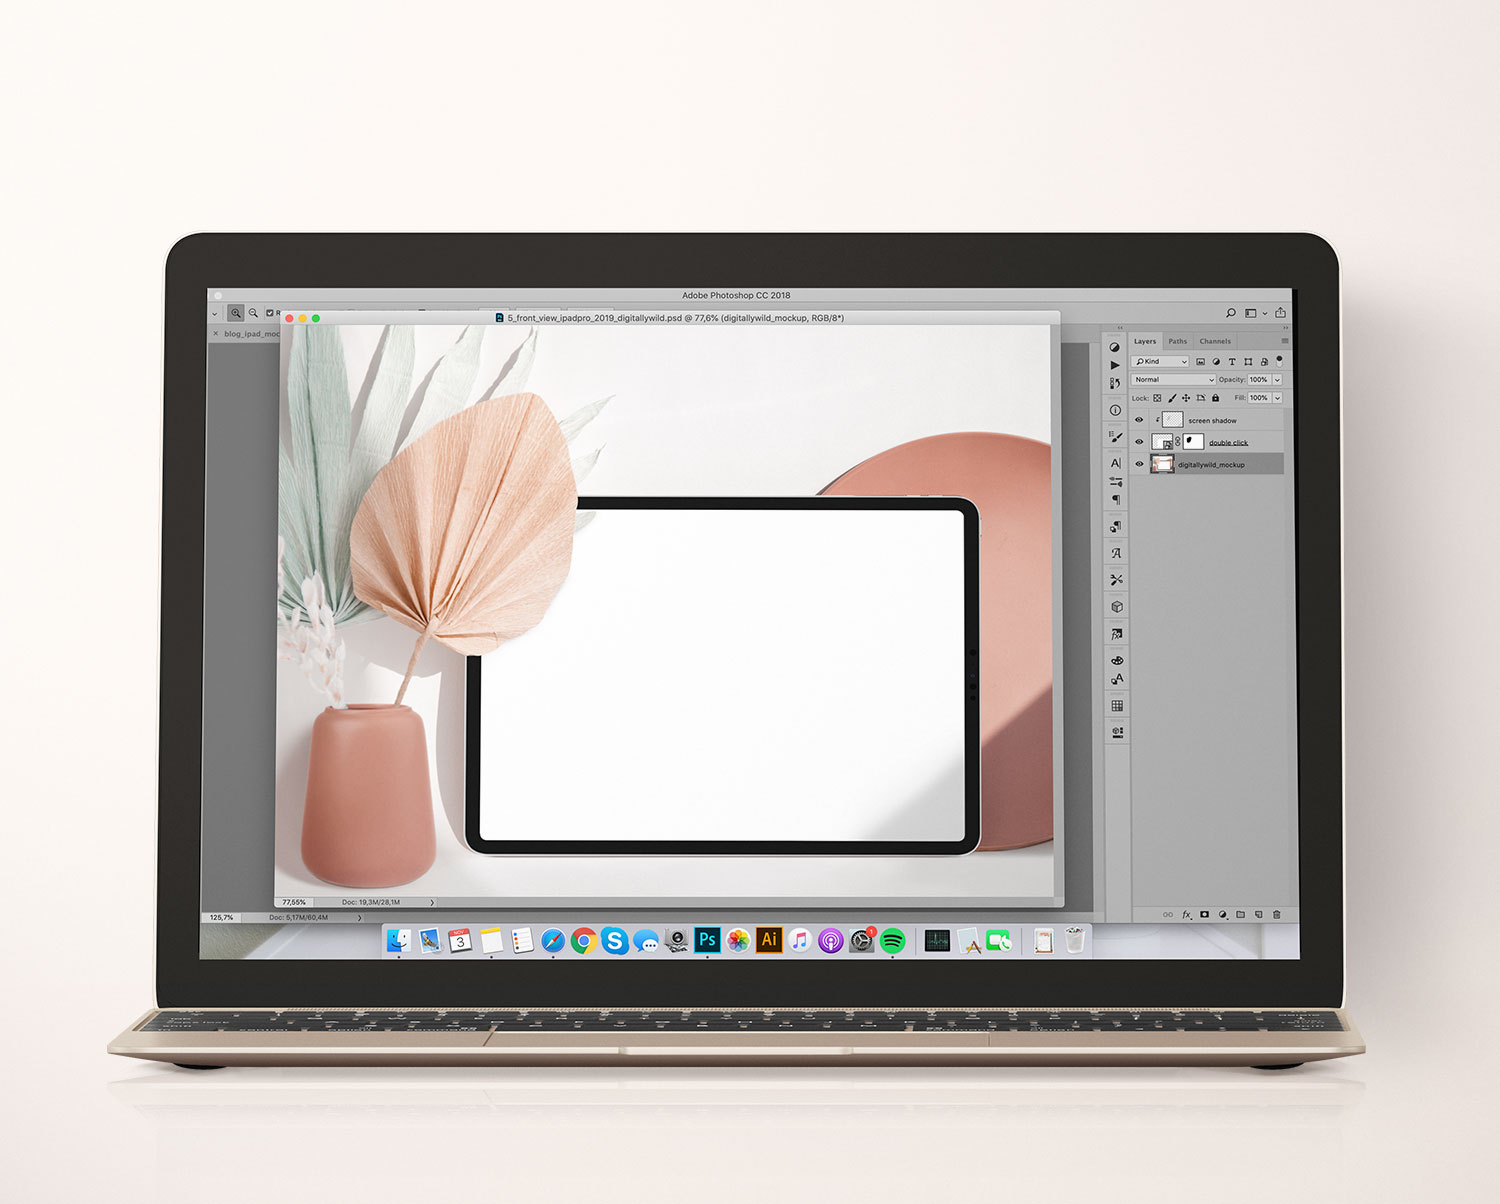
To add your screen:
1. Double click on the smart object icon on the layer that says “double click”
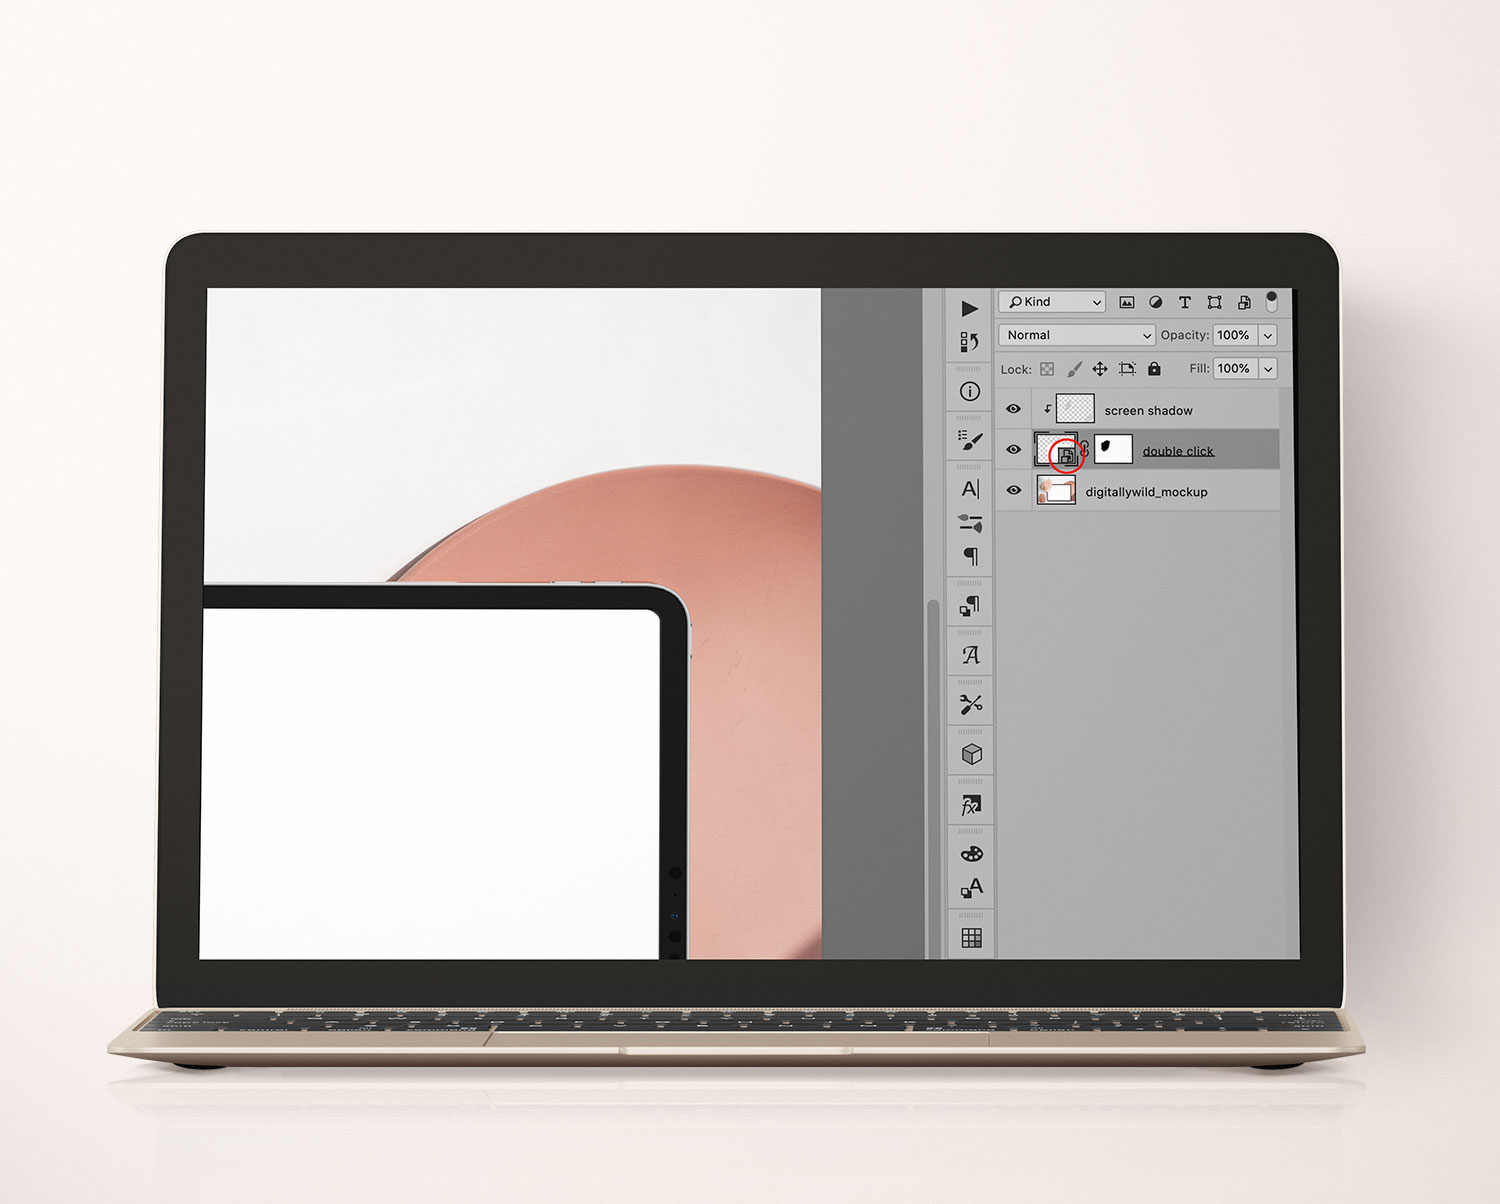
2. The new Photoshop window will open. Drag and drop your screen on the layer that says “place your image here”
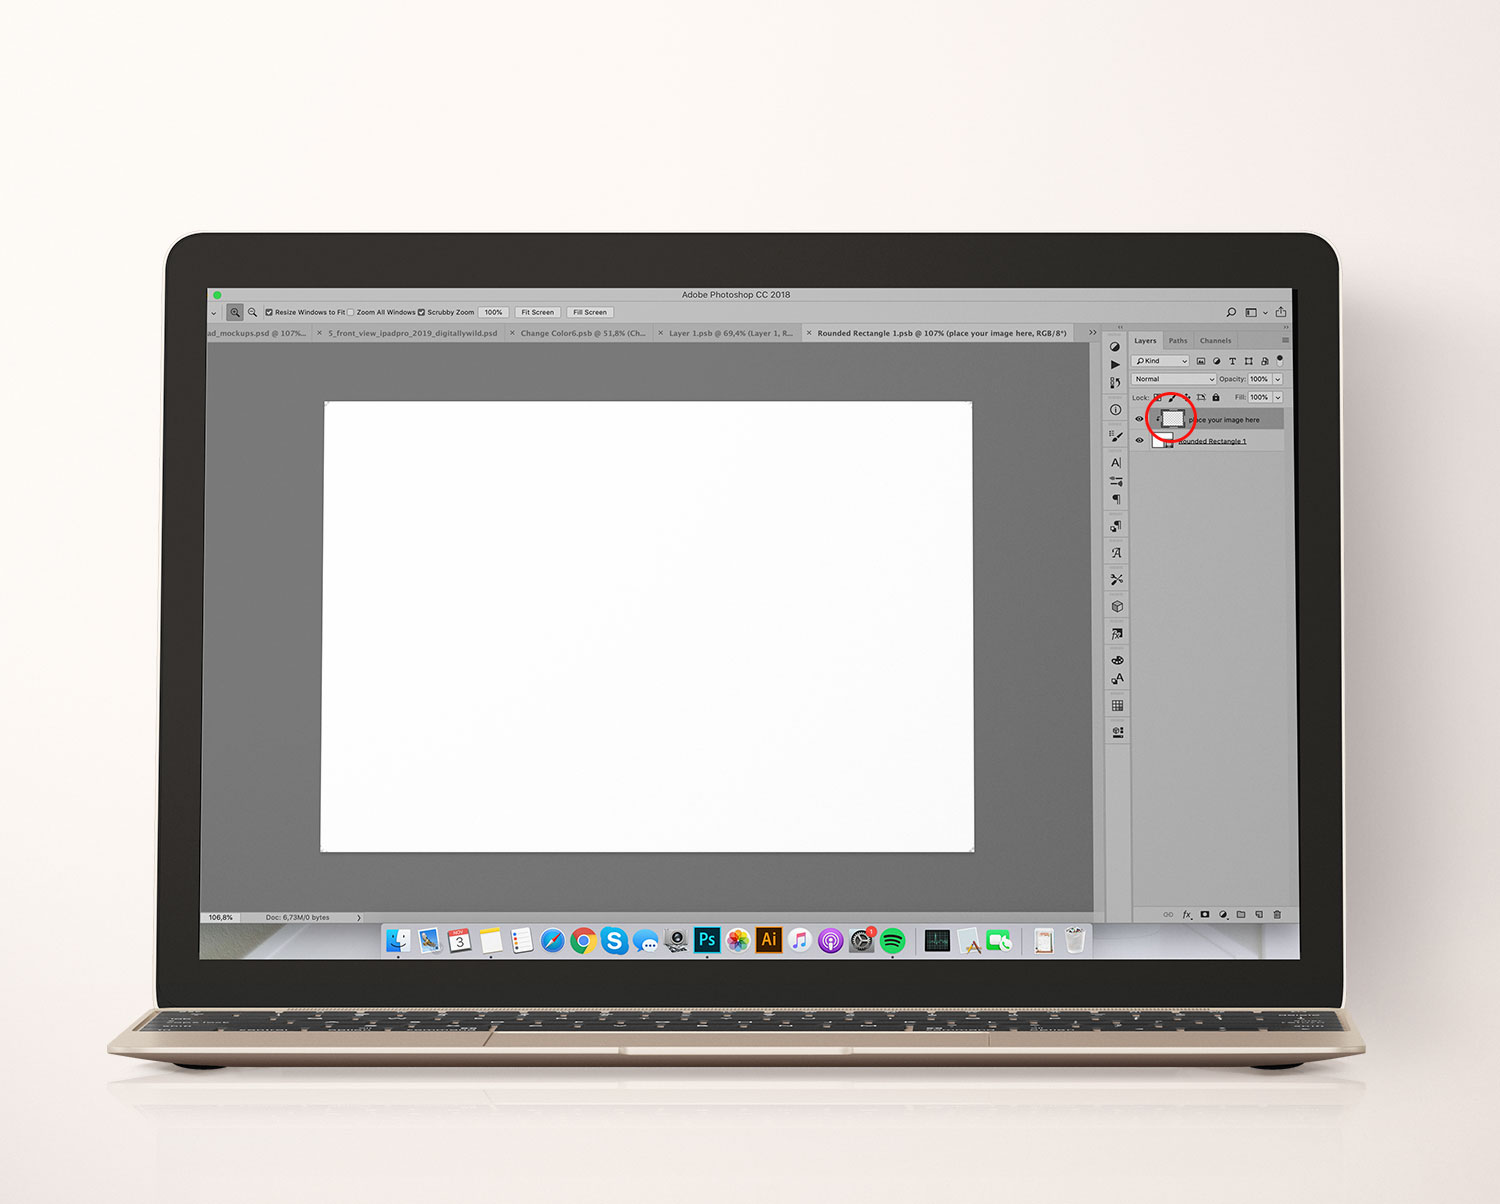
3. Press Cmnd + S on the keyboard to Save the document.
Go back to the mockup window. That’s it! Your screen is placed. :)
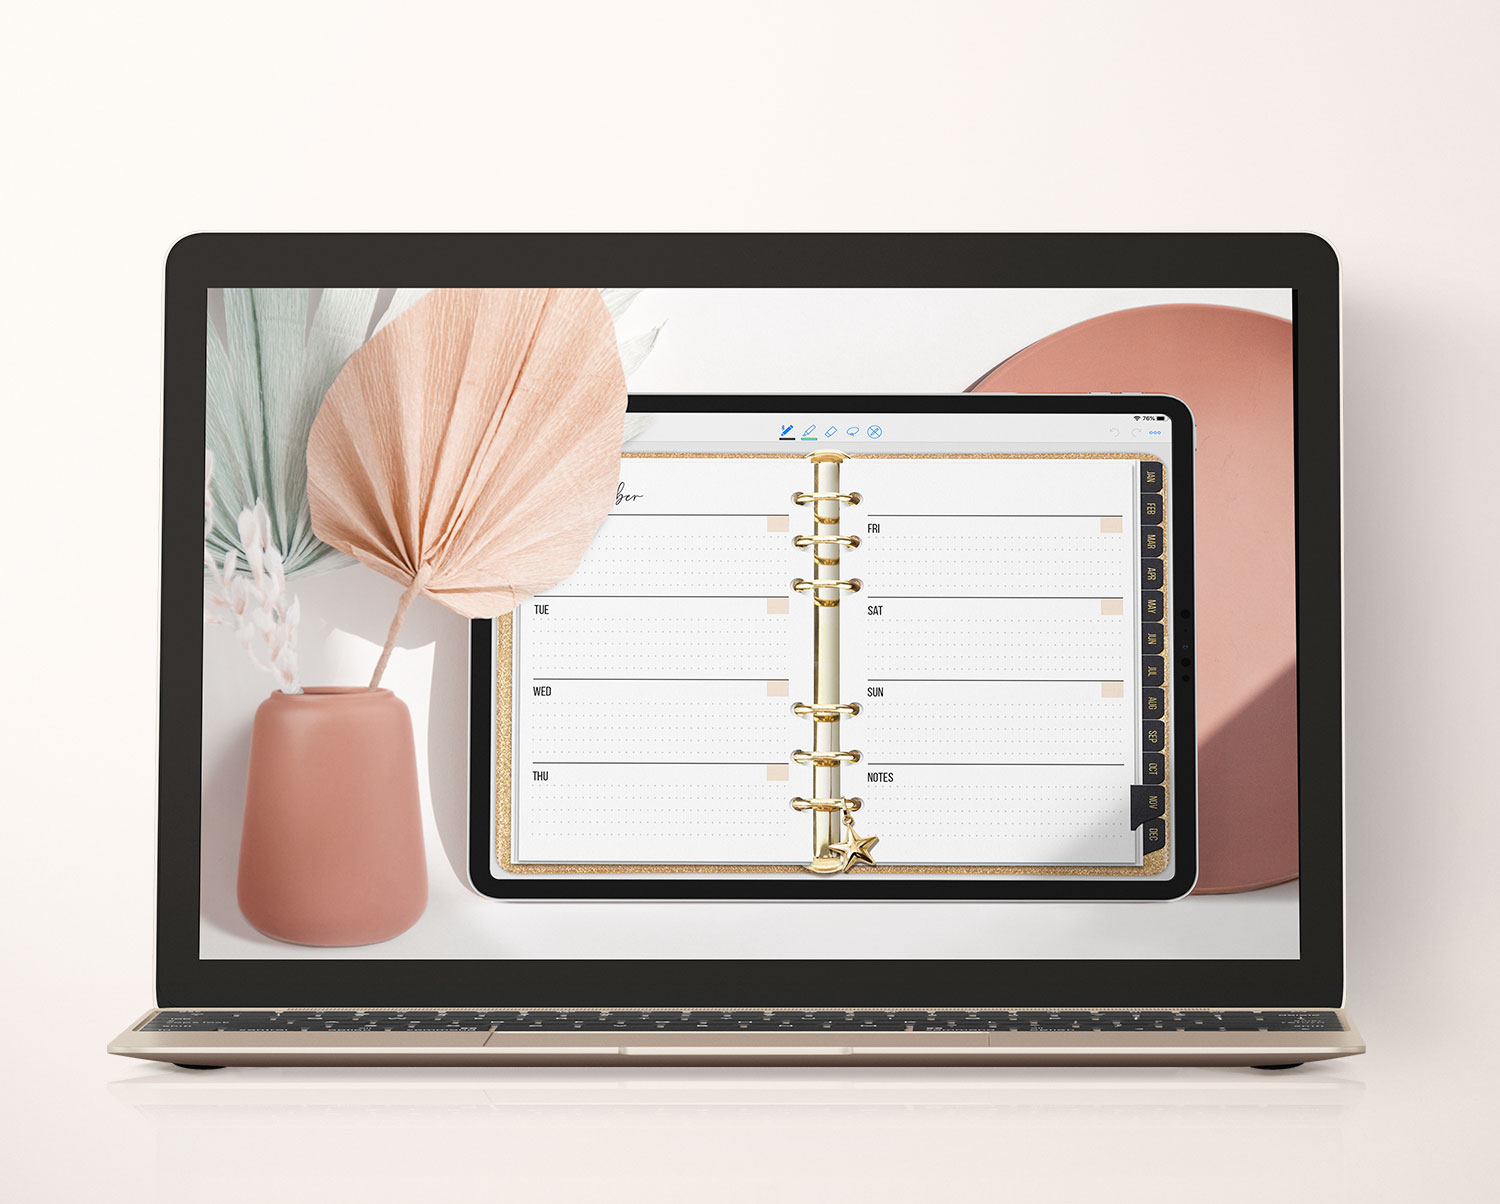
To place your screen in Procreate app on Ipad:
1. Open psd mockup file in Procreate. The app does not support smart objects, so the layers will look slightly different than in Photoshop.
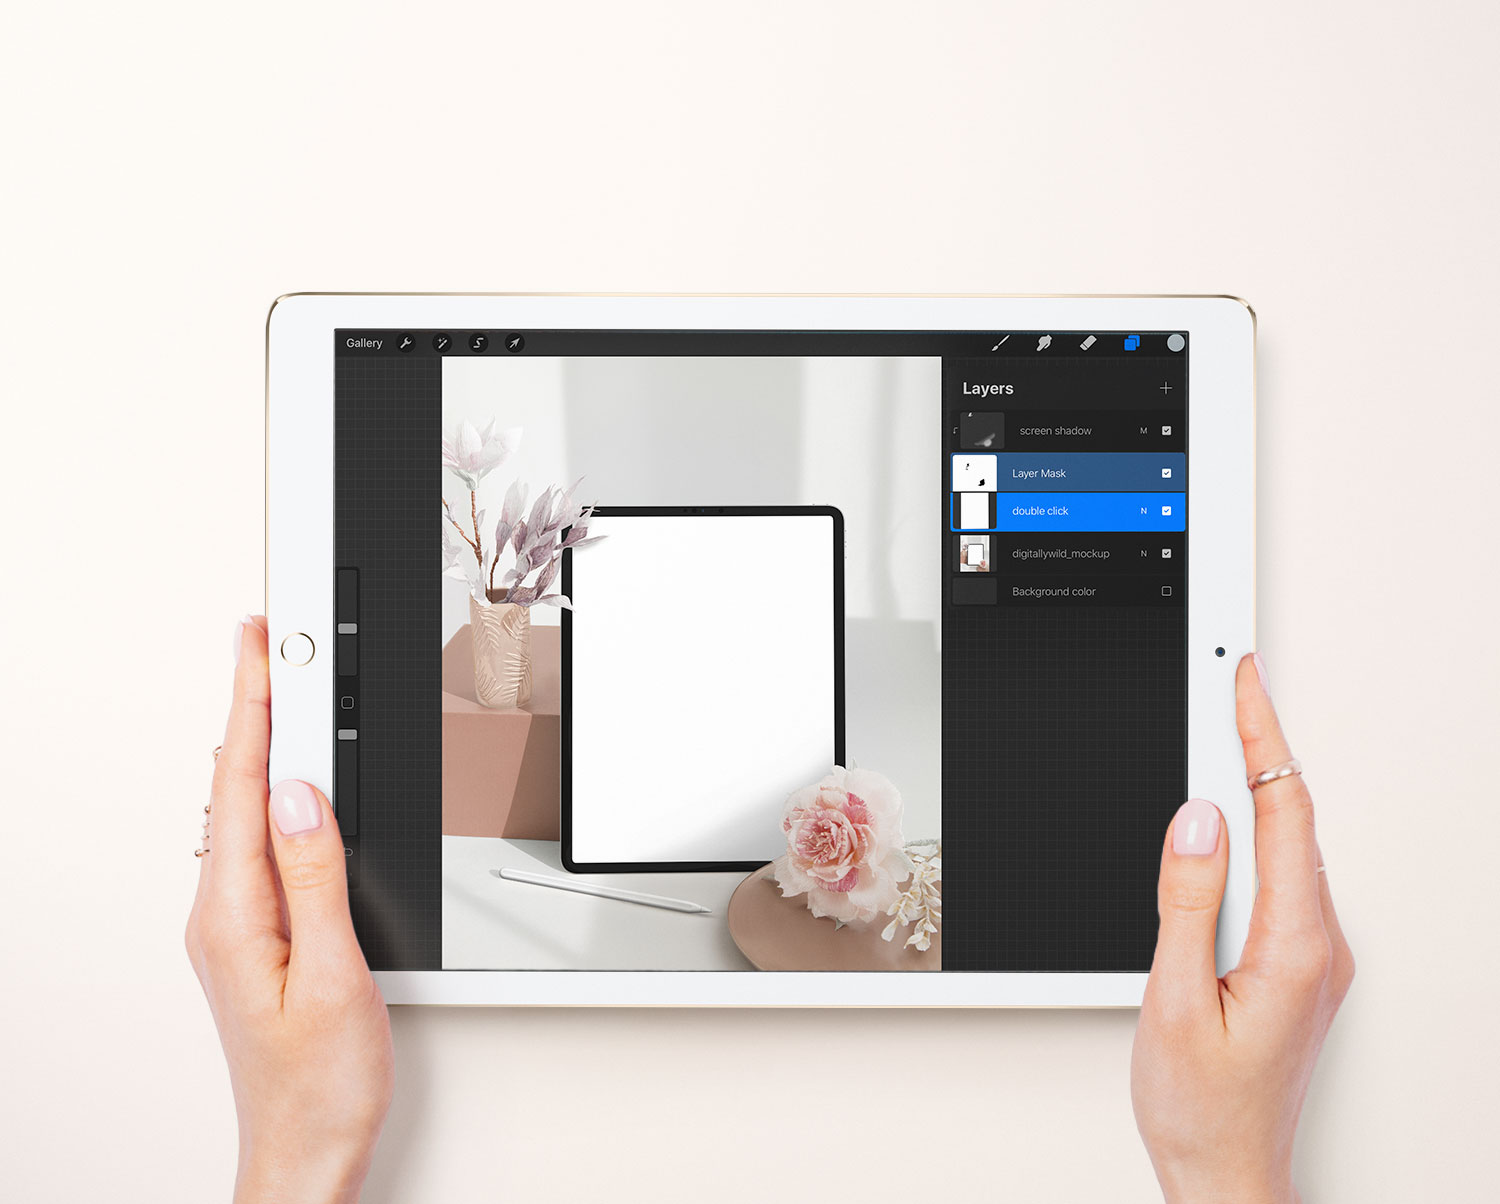
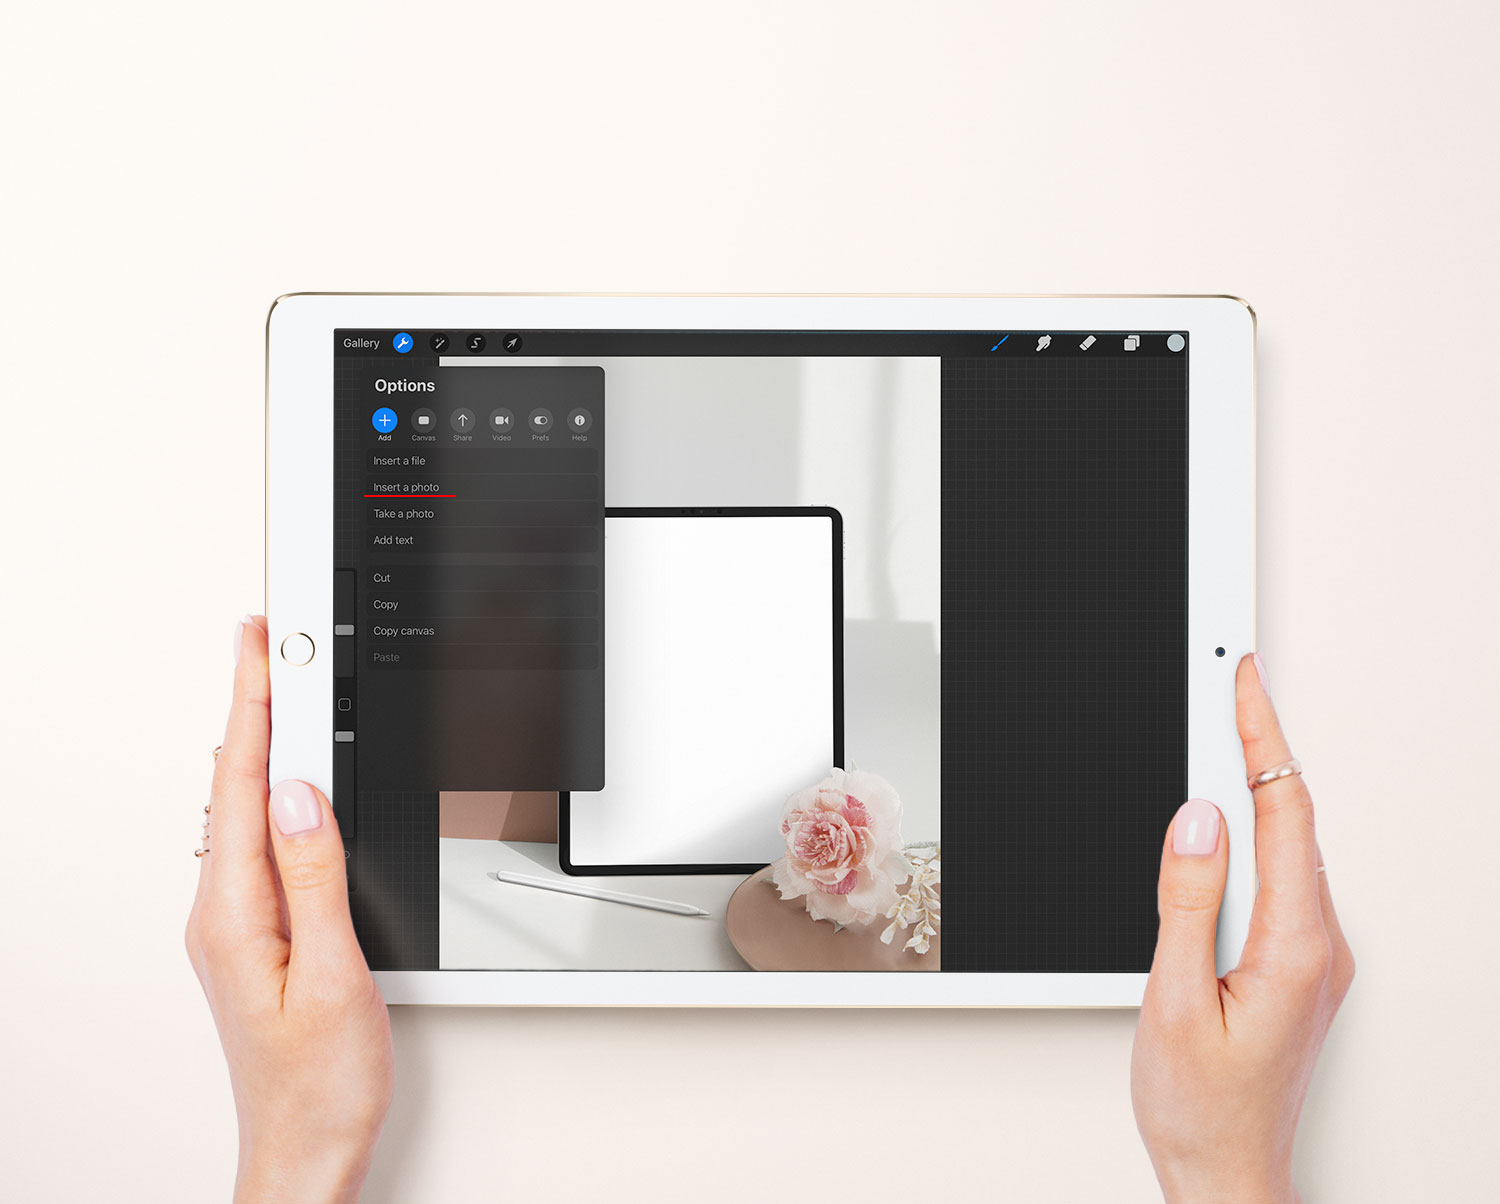
2. Make sure that “double click” layer is selected. Go to Add - Insert a photo and select your screenshot.
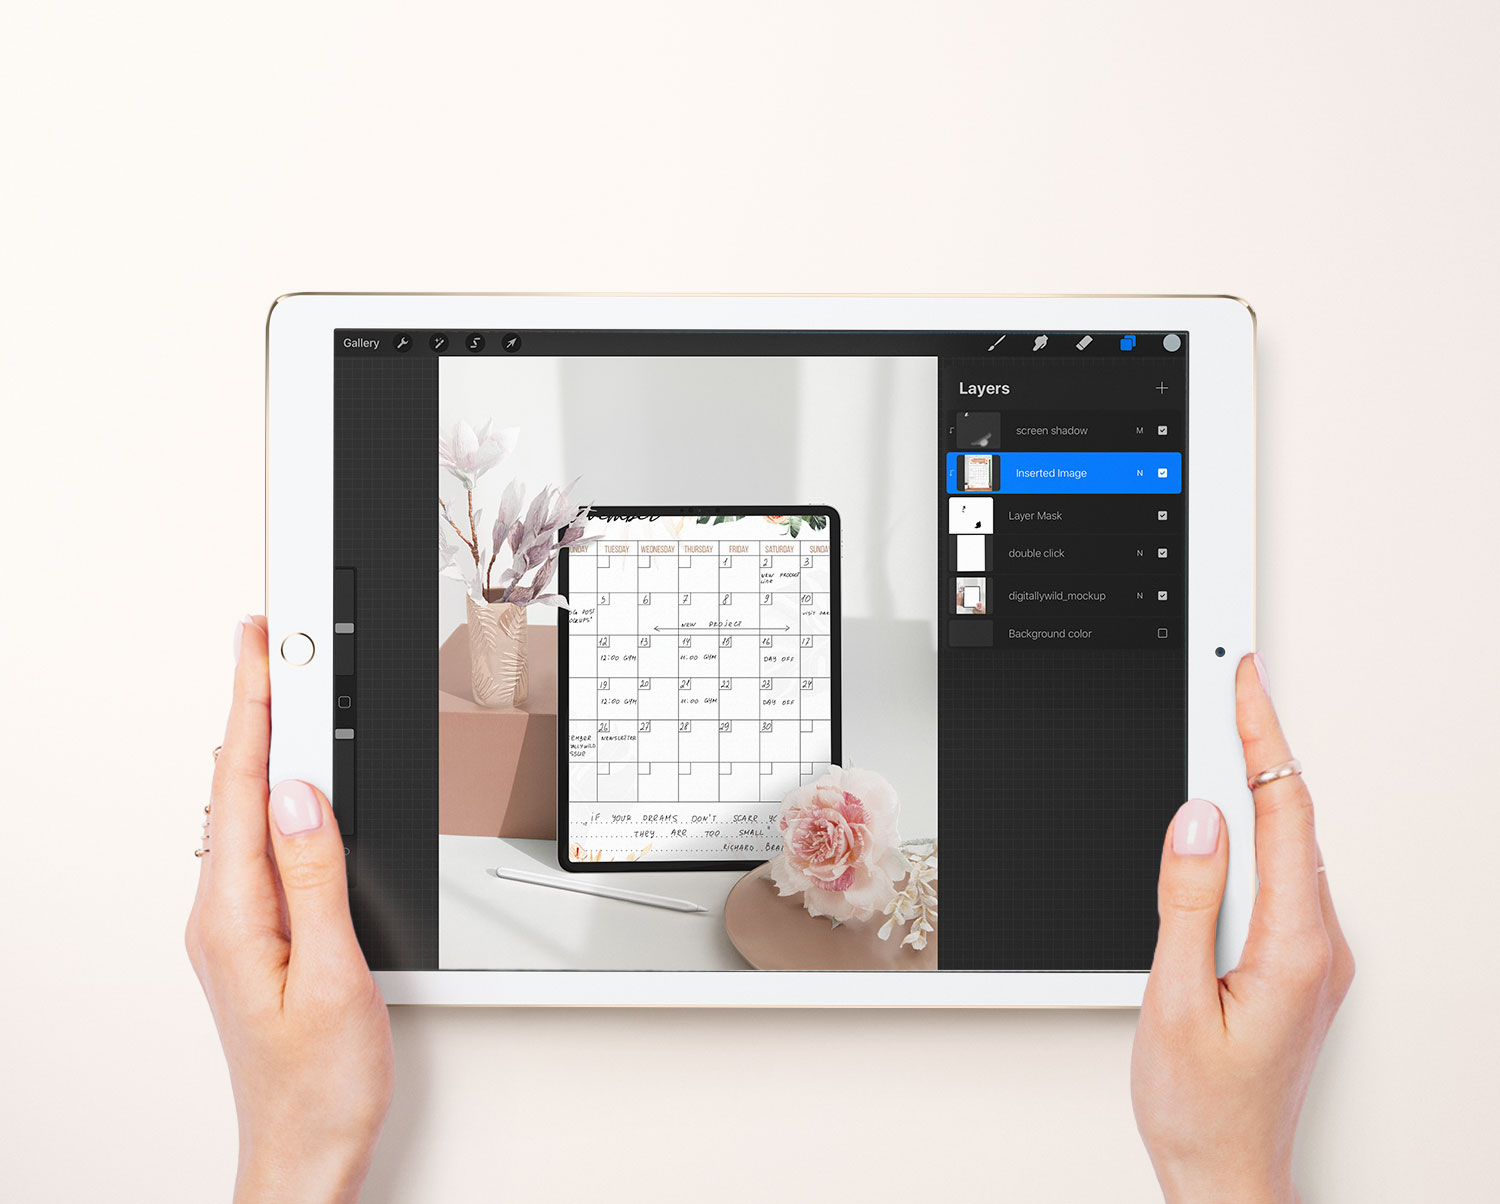
3. Your screen will be placed as clipping mask.
4. Now use Rectangle selection tool to fit your image into the Ipad screen.
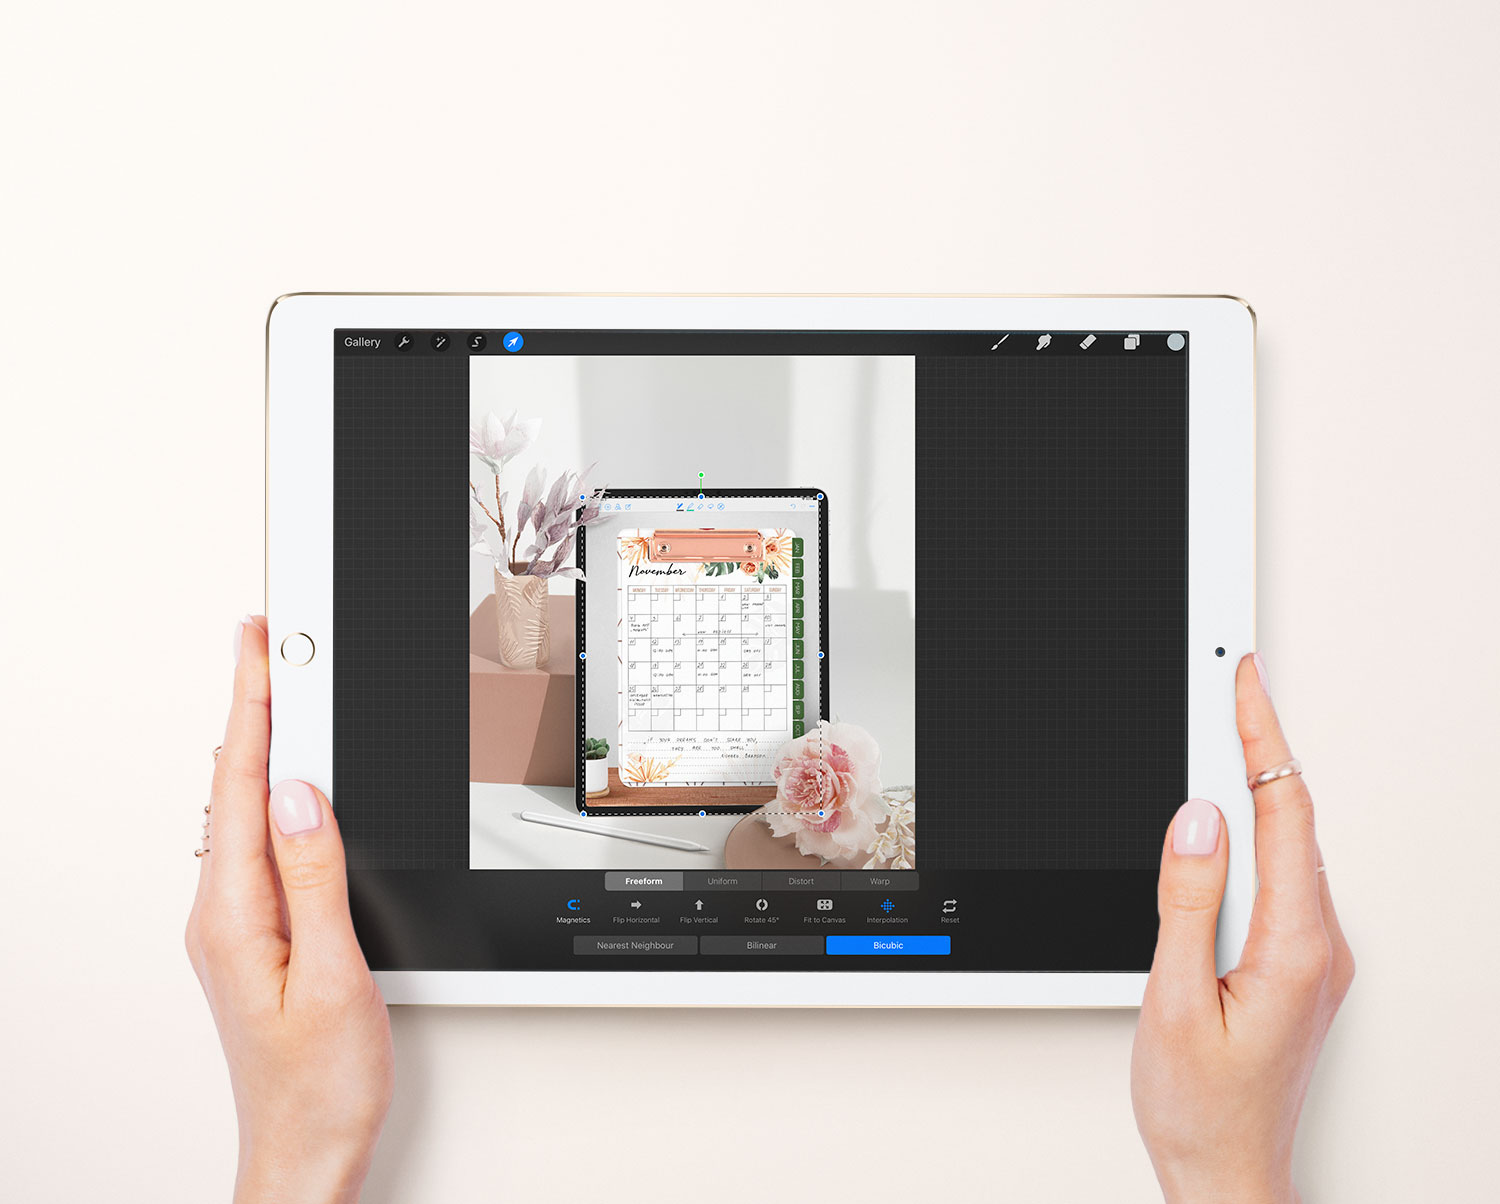
5. Due to different colour profiles, the image in Procreate might be slightly less saturated. To fix this, use Hue/ Saturation adjustments to bring back the colours.
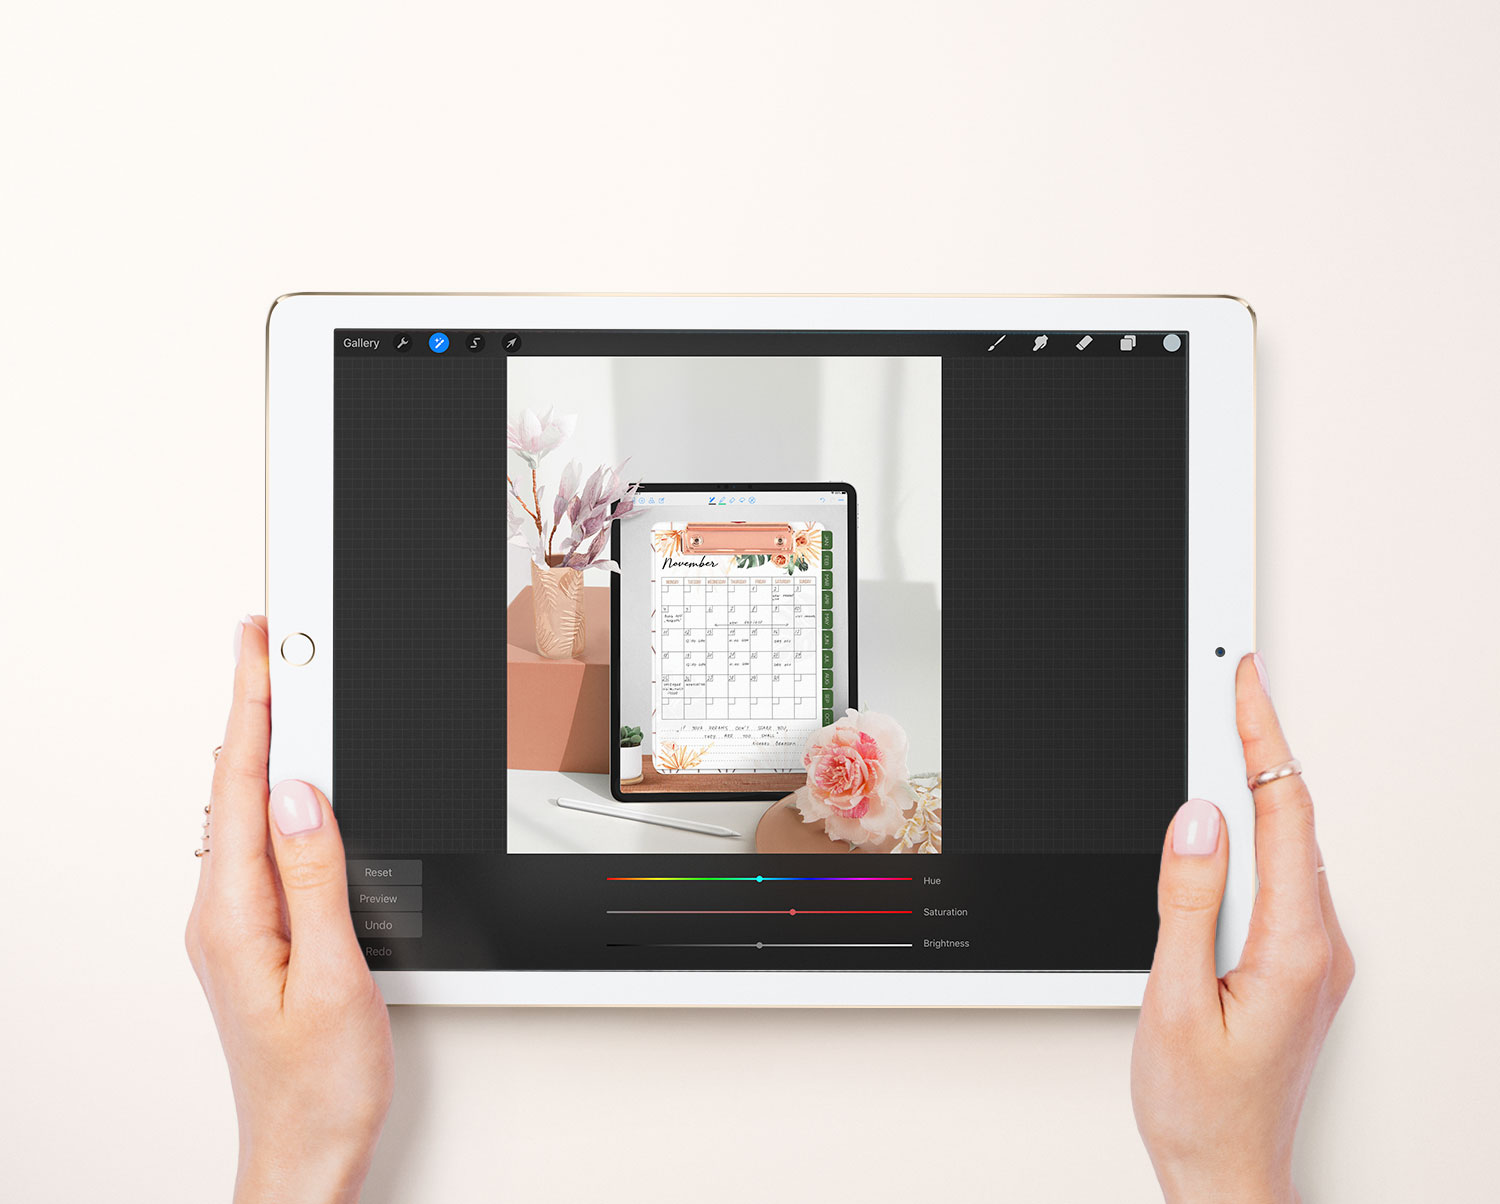
Export as .jpg and share on social media :)
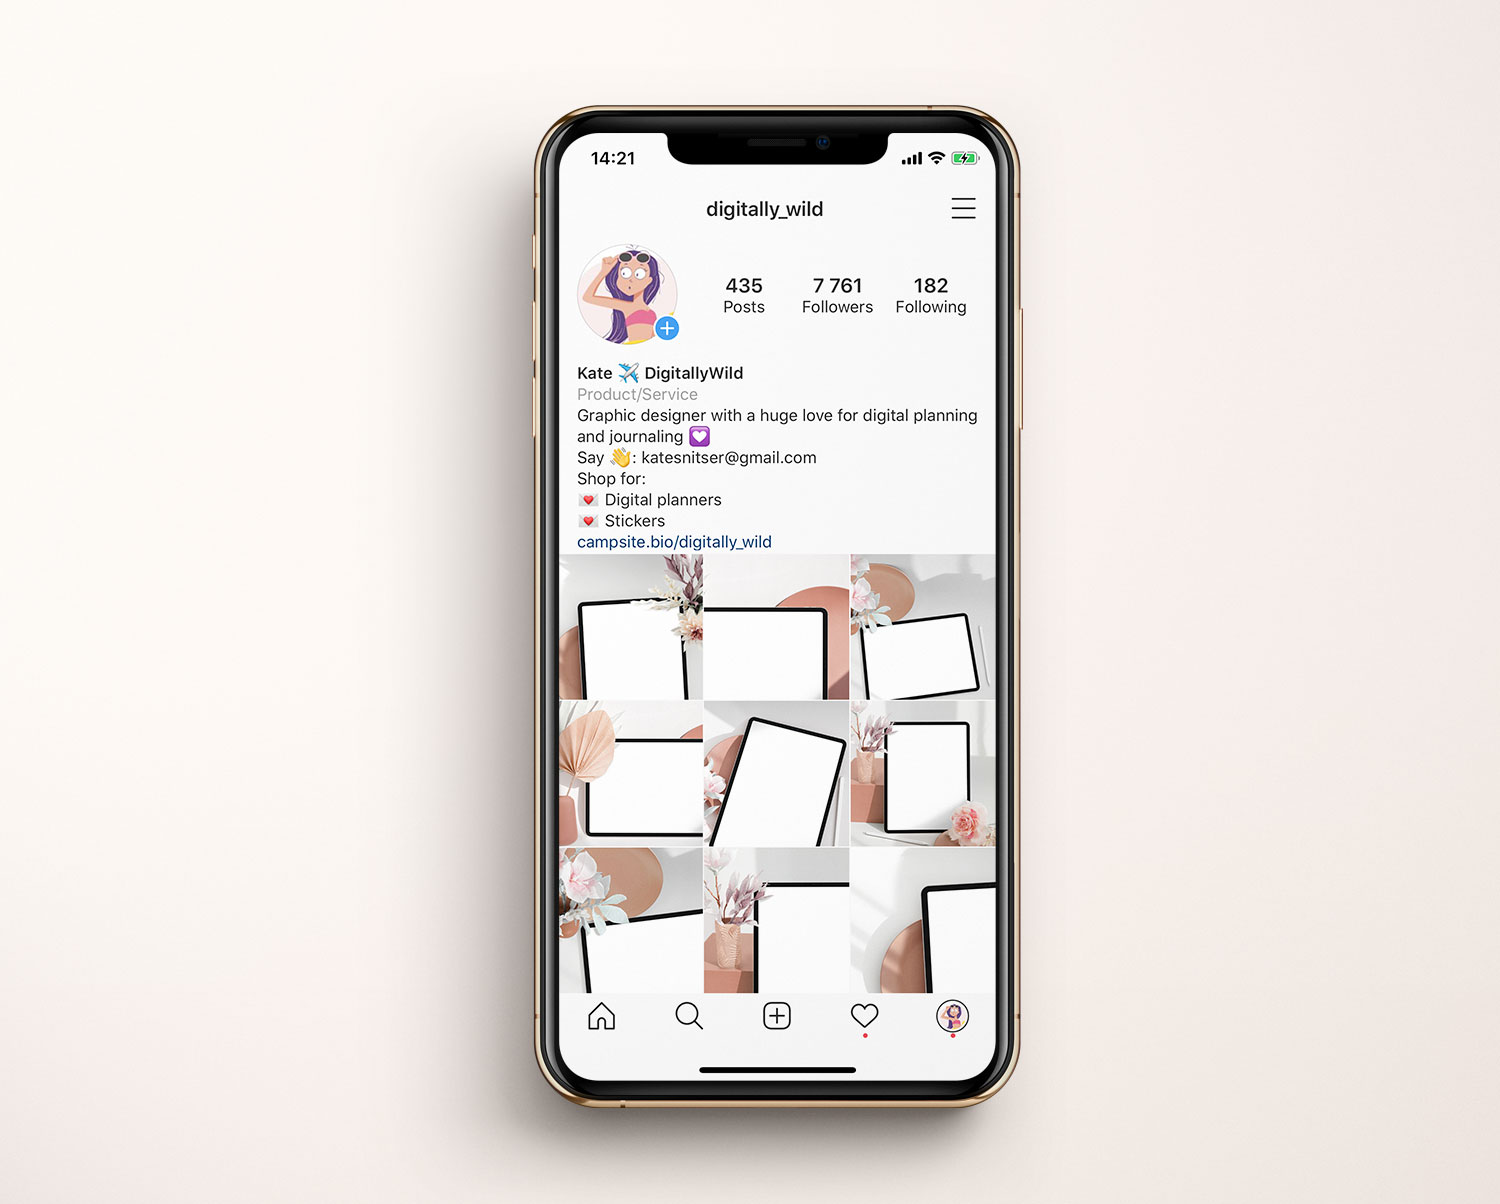
Here is how your Instagram grid might look like with DigitallyWild mockups:
More is coming.
Talk to you soon,
Kate