How to make seamless patterns from your drawings
Patterns are so much fun! Would you agree? And they even more fun when Done yourself. If you like to draw and want to convert your drawings into patterns to use for scrapbook pages or to decorate your journal, or make notebook covers - this post is for you.
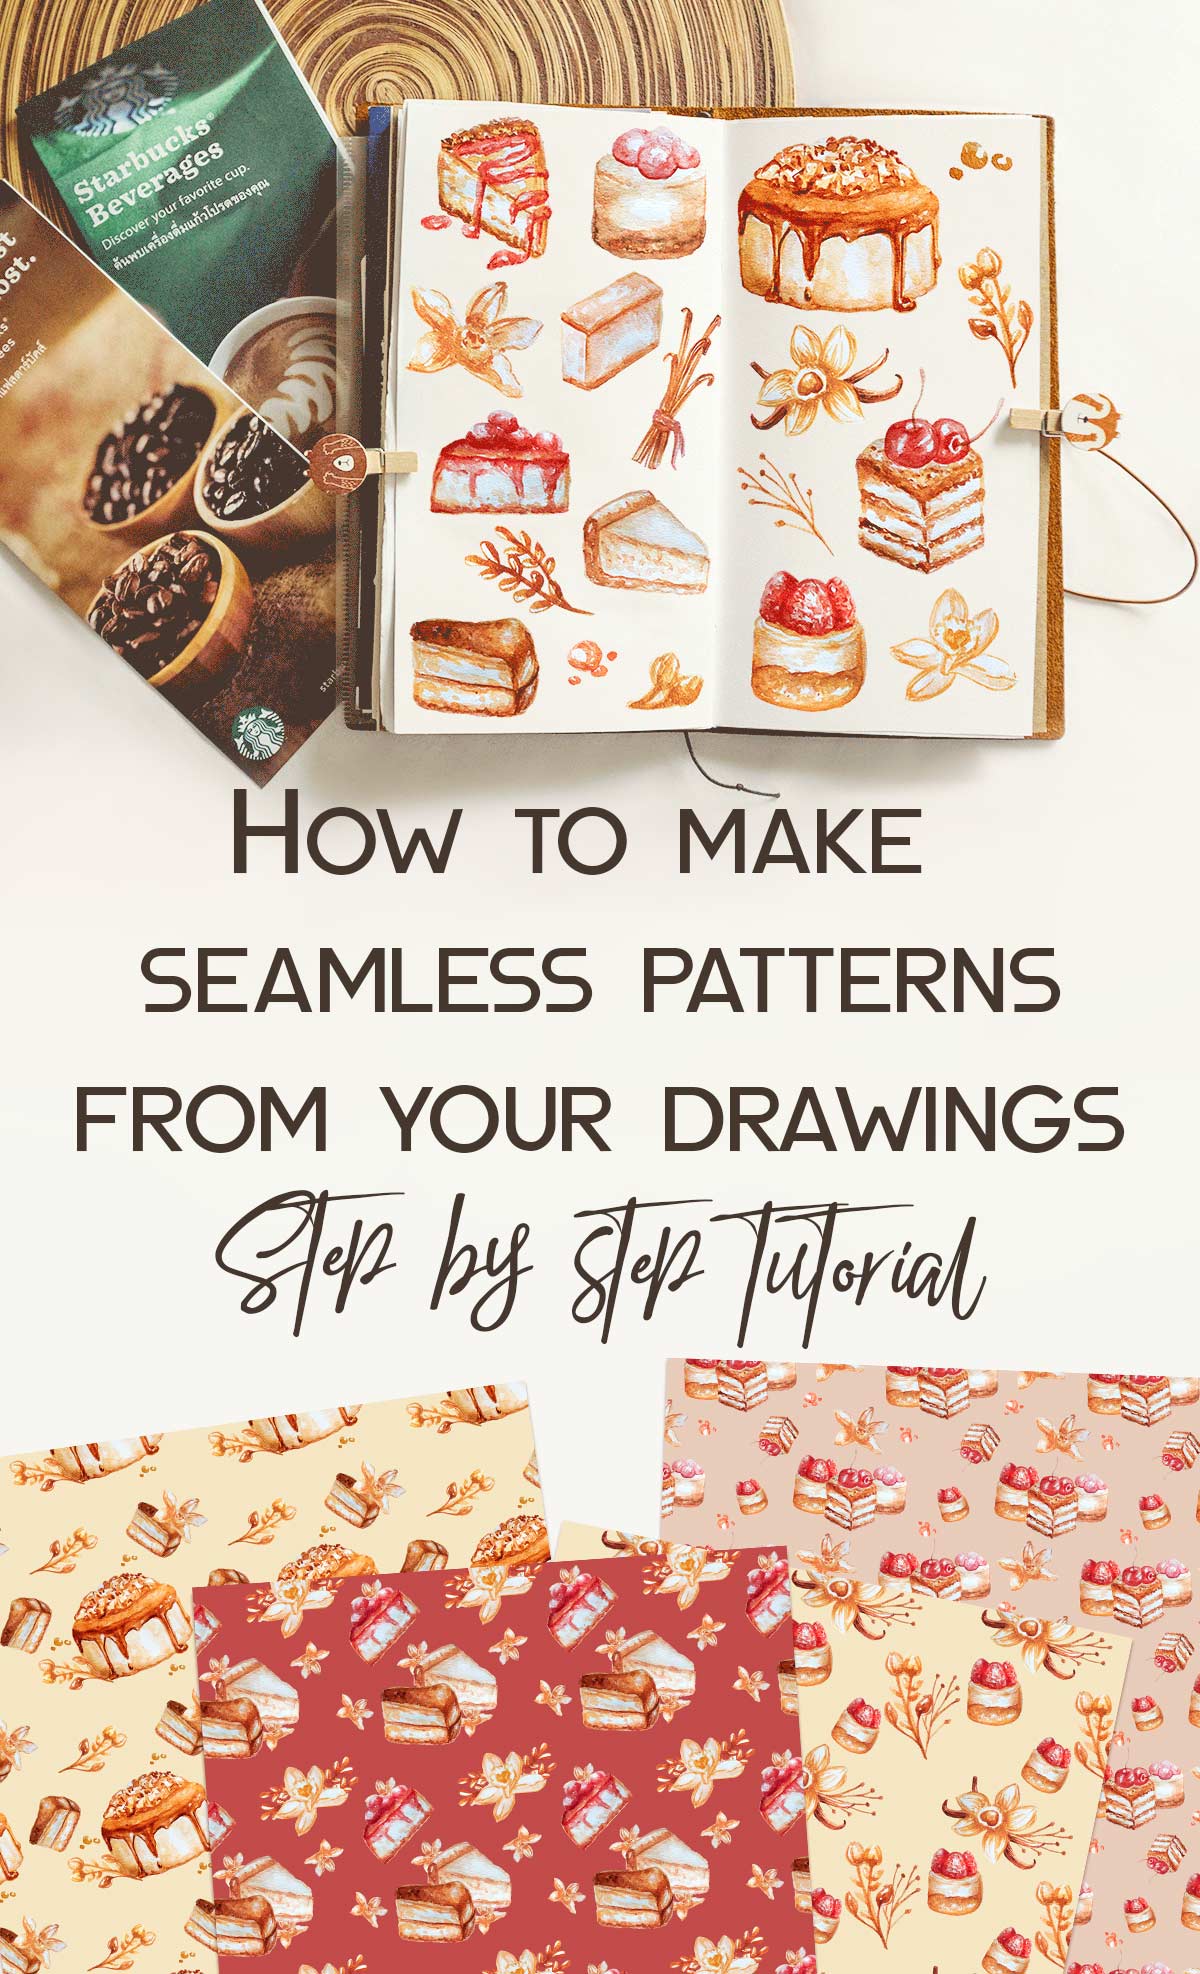
What you'll need: drawings, camera and Photoshop. If you don't have Photoshop, you can install the trial version.
First, draw elements you want to create a pattern from. Then take a close up shots of those.
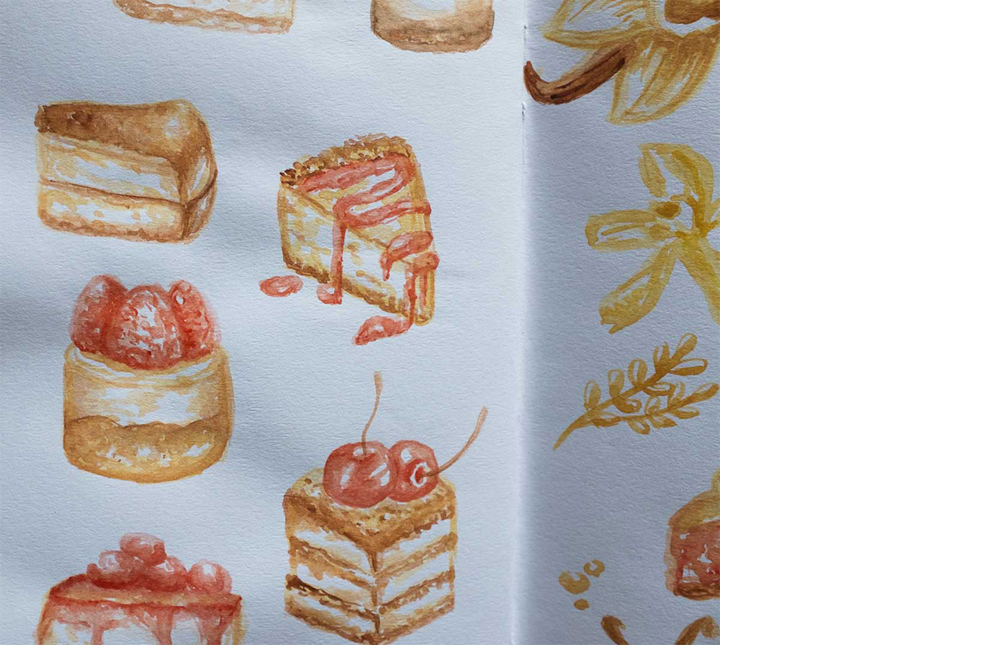
Fire up Photoshop and import your photos.
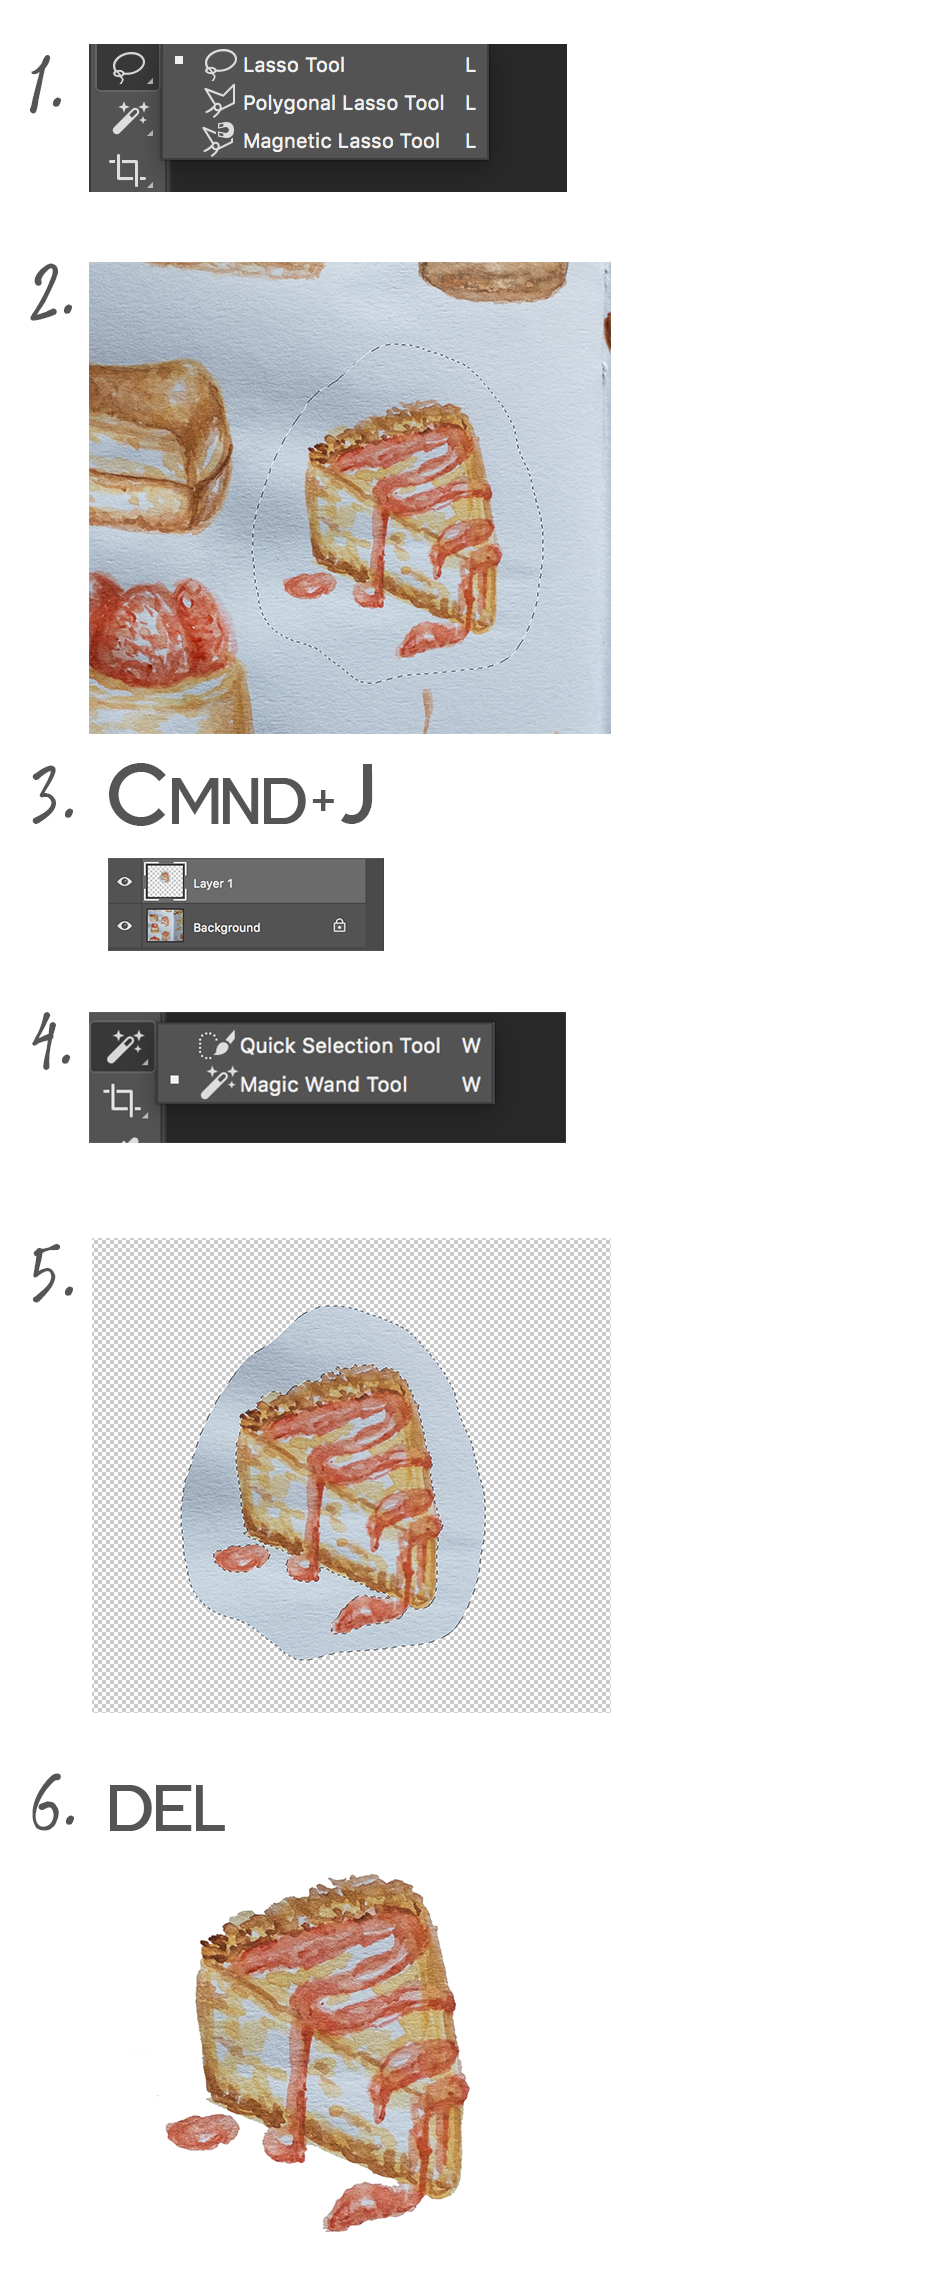
Follow these steps to cut out elements:
1. Select Lasso Tool.
2. Draw a selection around your drawing.
3. Press Cmnd +J. It'll copy your selection on the new layer.
4. Select Magic wand tool.
5. Click on the background around drawing to select it. Hold Shift to select the whole area.
6. Press Delete. The selection will be deleted, leaving your illustration on the transparent background.
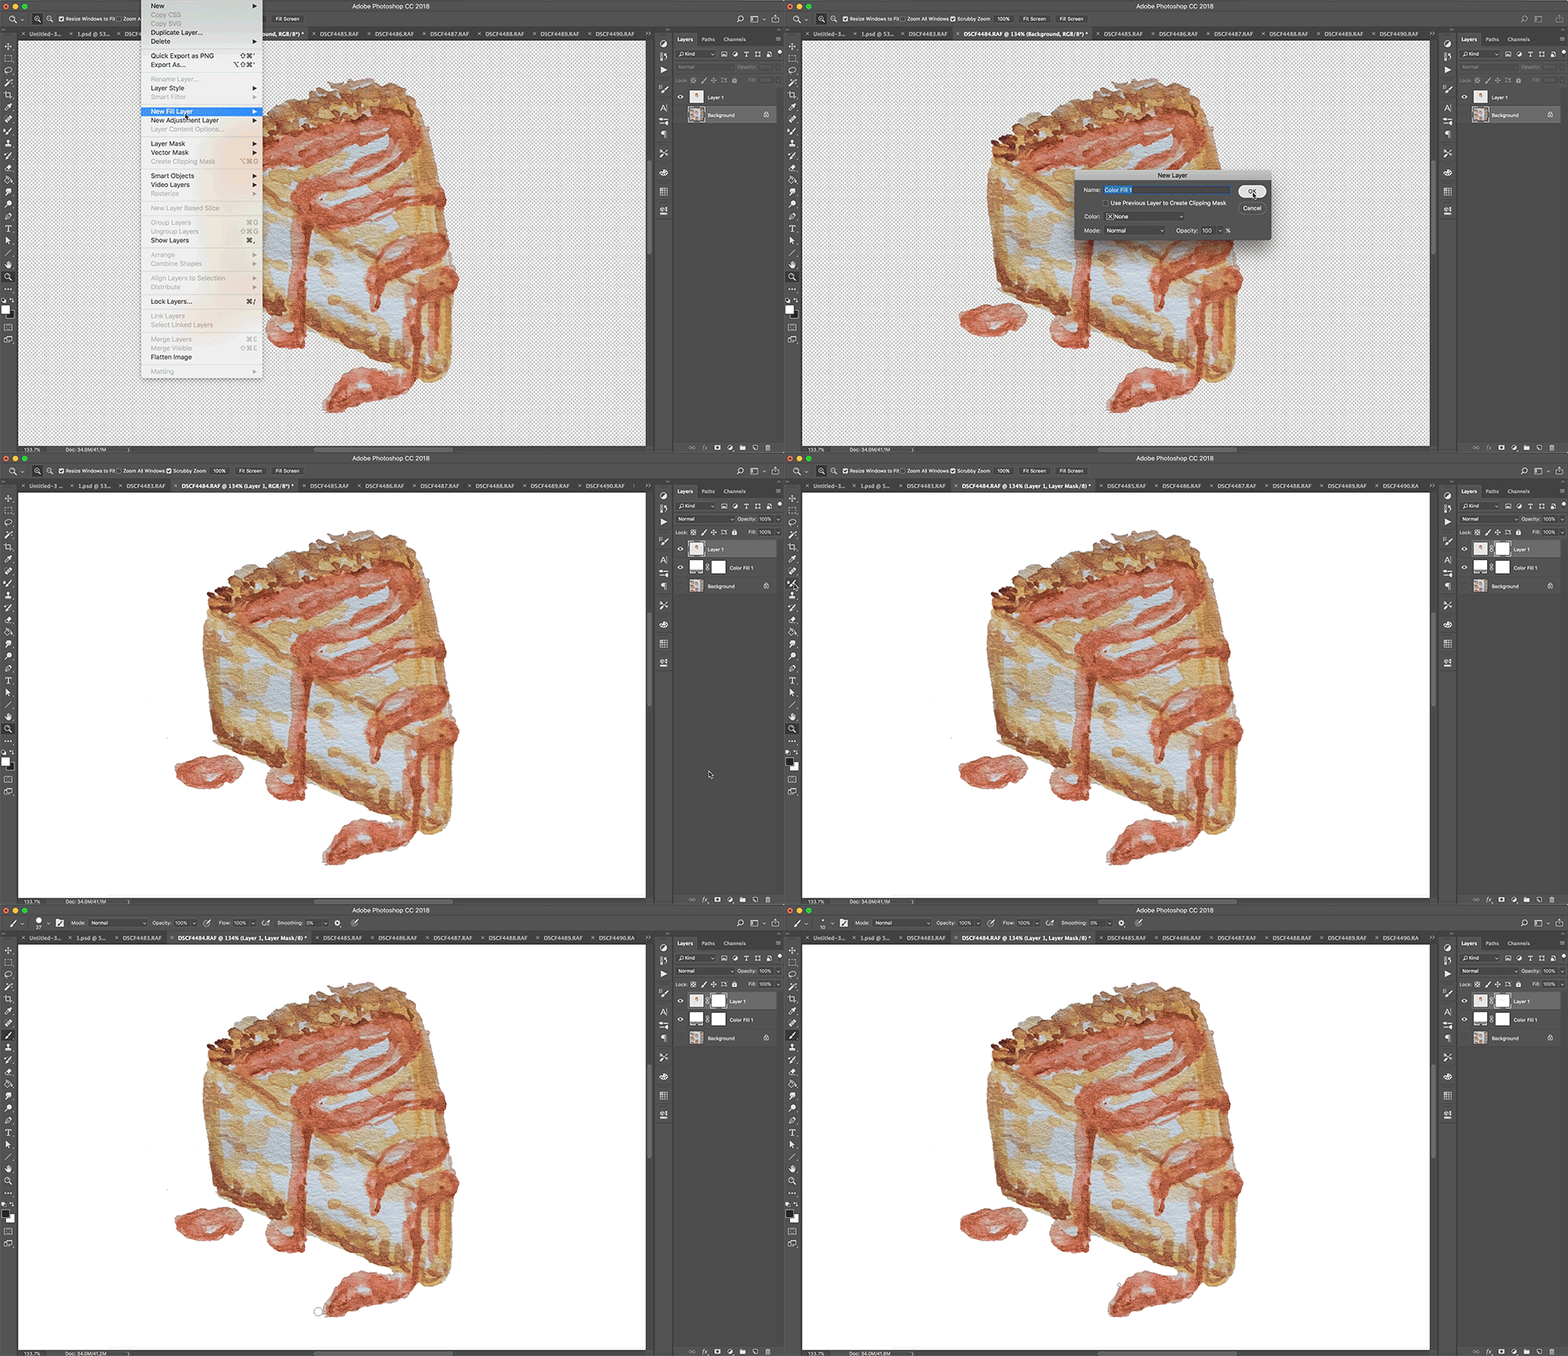
Now, if you are not afraid of some dirty work, we'll clean up the edges of the illustration.
- Select Layer - New Fill layer - Solid color. (This layer is just so we could see the edges more clearly. We'll delete it after.)
- Now click on the layer with drawing and Create a mask by clicking on the icon as shown.
- Select Brush tool and make sure that black is an active color. (You can change Brush settings by clicking right mouse button)
- Click on the mask to activate it and with black brush remove unwanted and sharp edges around the illustration.
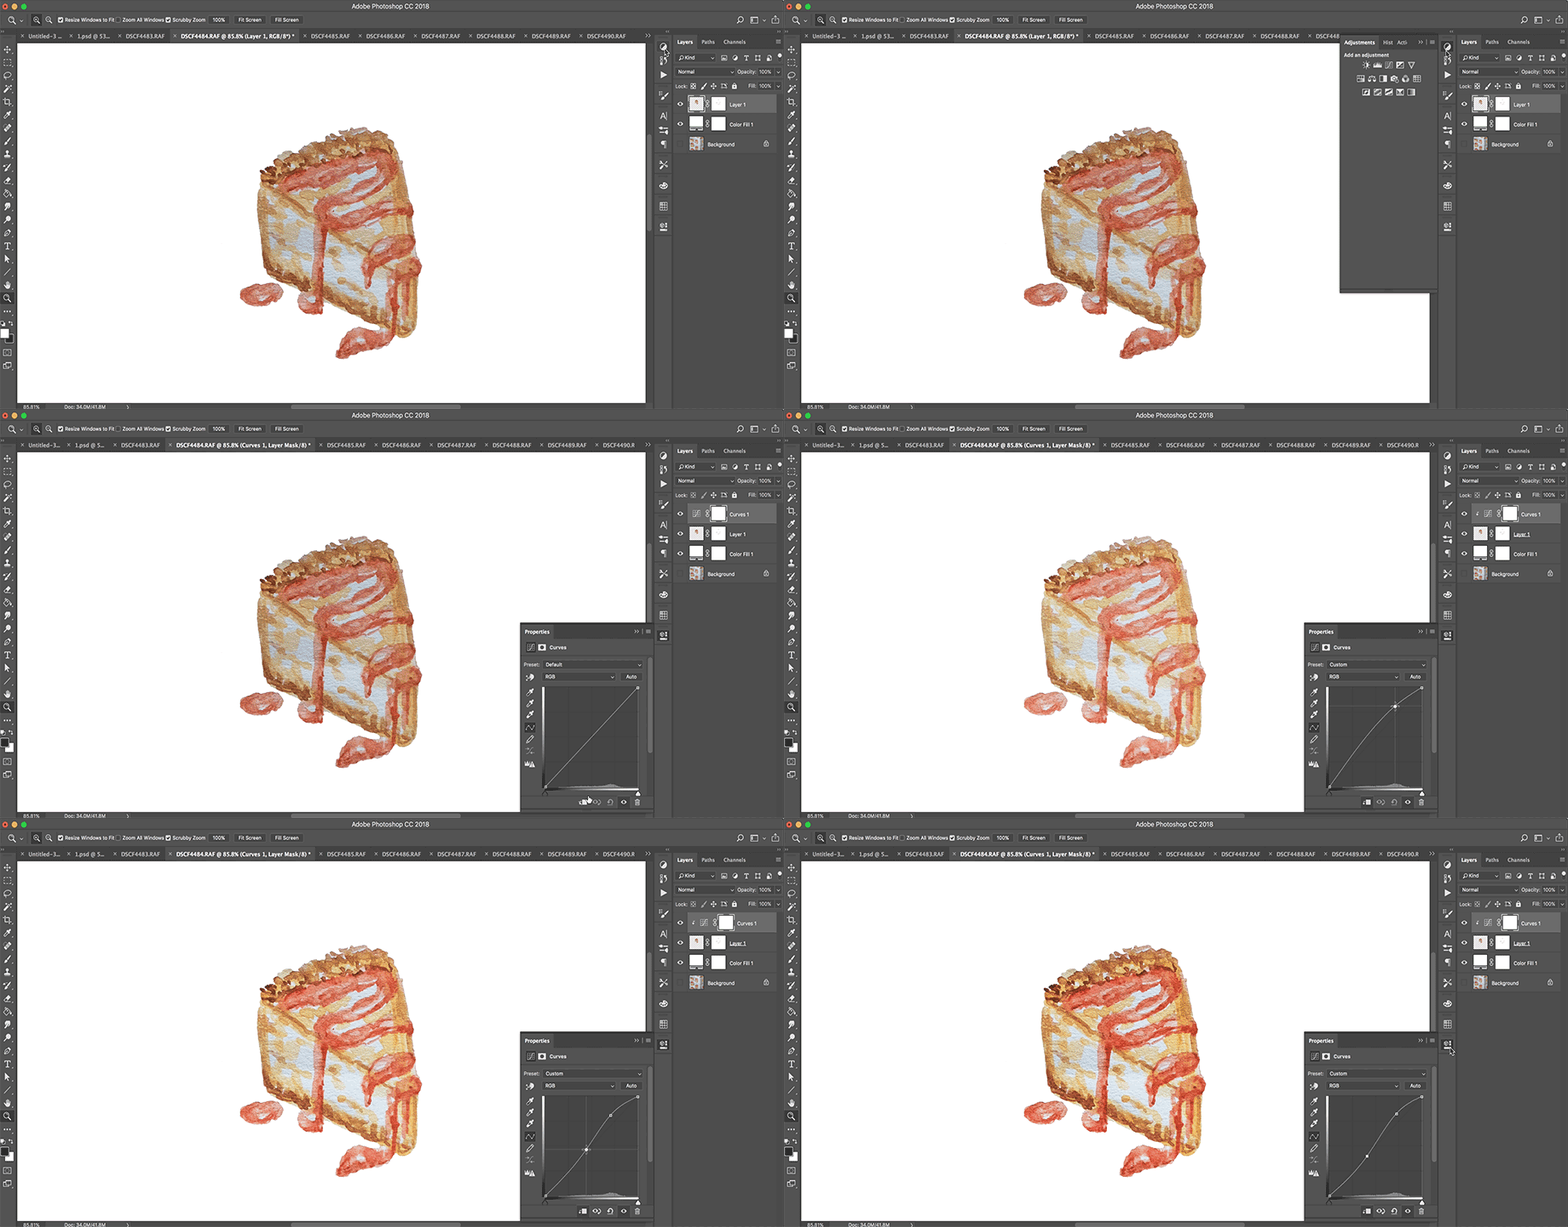
Okay, it's time to retouch the image a little. We'll make it brighter, more contrasty and vivid. More appealing to look at.
- Select Curves in Adjustment layers (if you don't have them pinned in the quick panel, choose Layer - New adjustment layer - Curves, in the top menu).
- Make Curves a clipping mask to the layer with your illustration (press on the first icon in the curves window as shown).
- Create two adjustment points on the curve and drag them as shown. This will brighten the image and add more contrast and saturation.
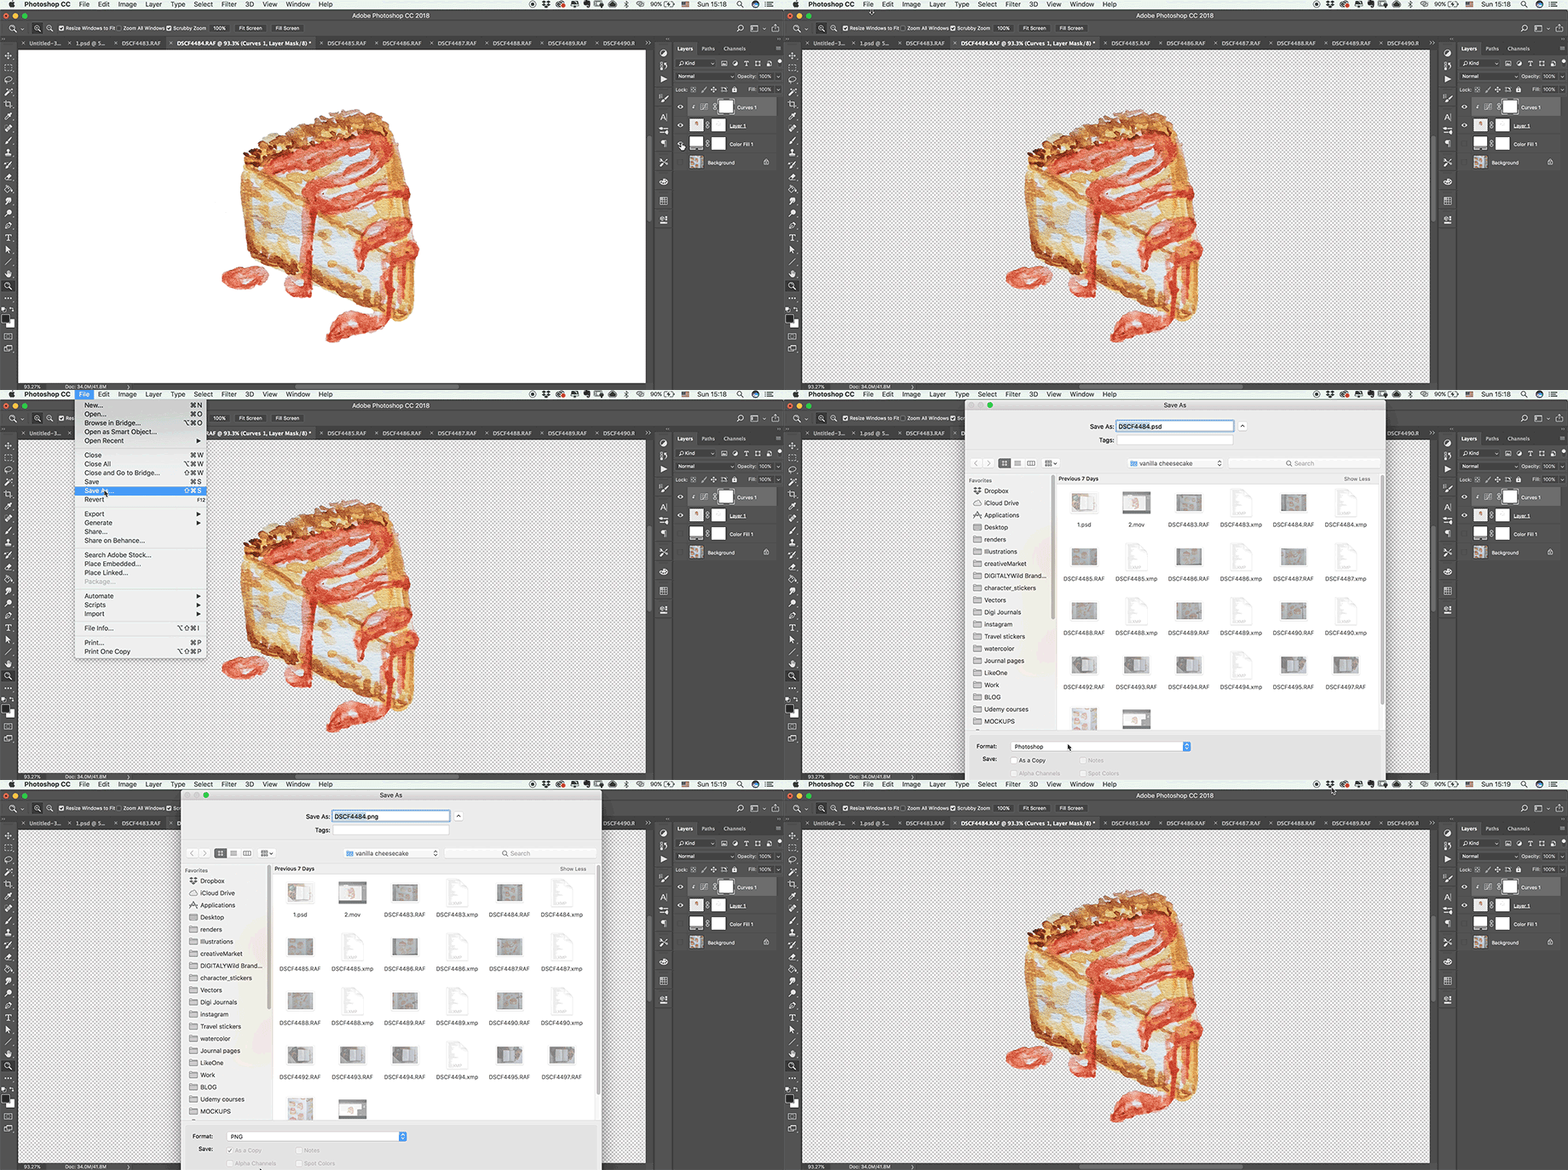
Save your drawing as .png file:
- Make sure to remove fill color layer, so that illustration would be on the transparent background
- Choose File - Save as - png
Repeat the steps above for all the elements you want to use in pattern.
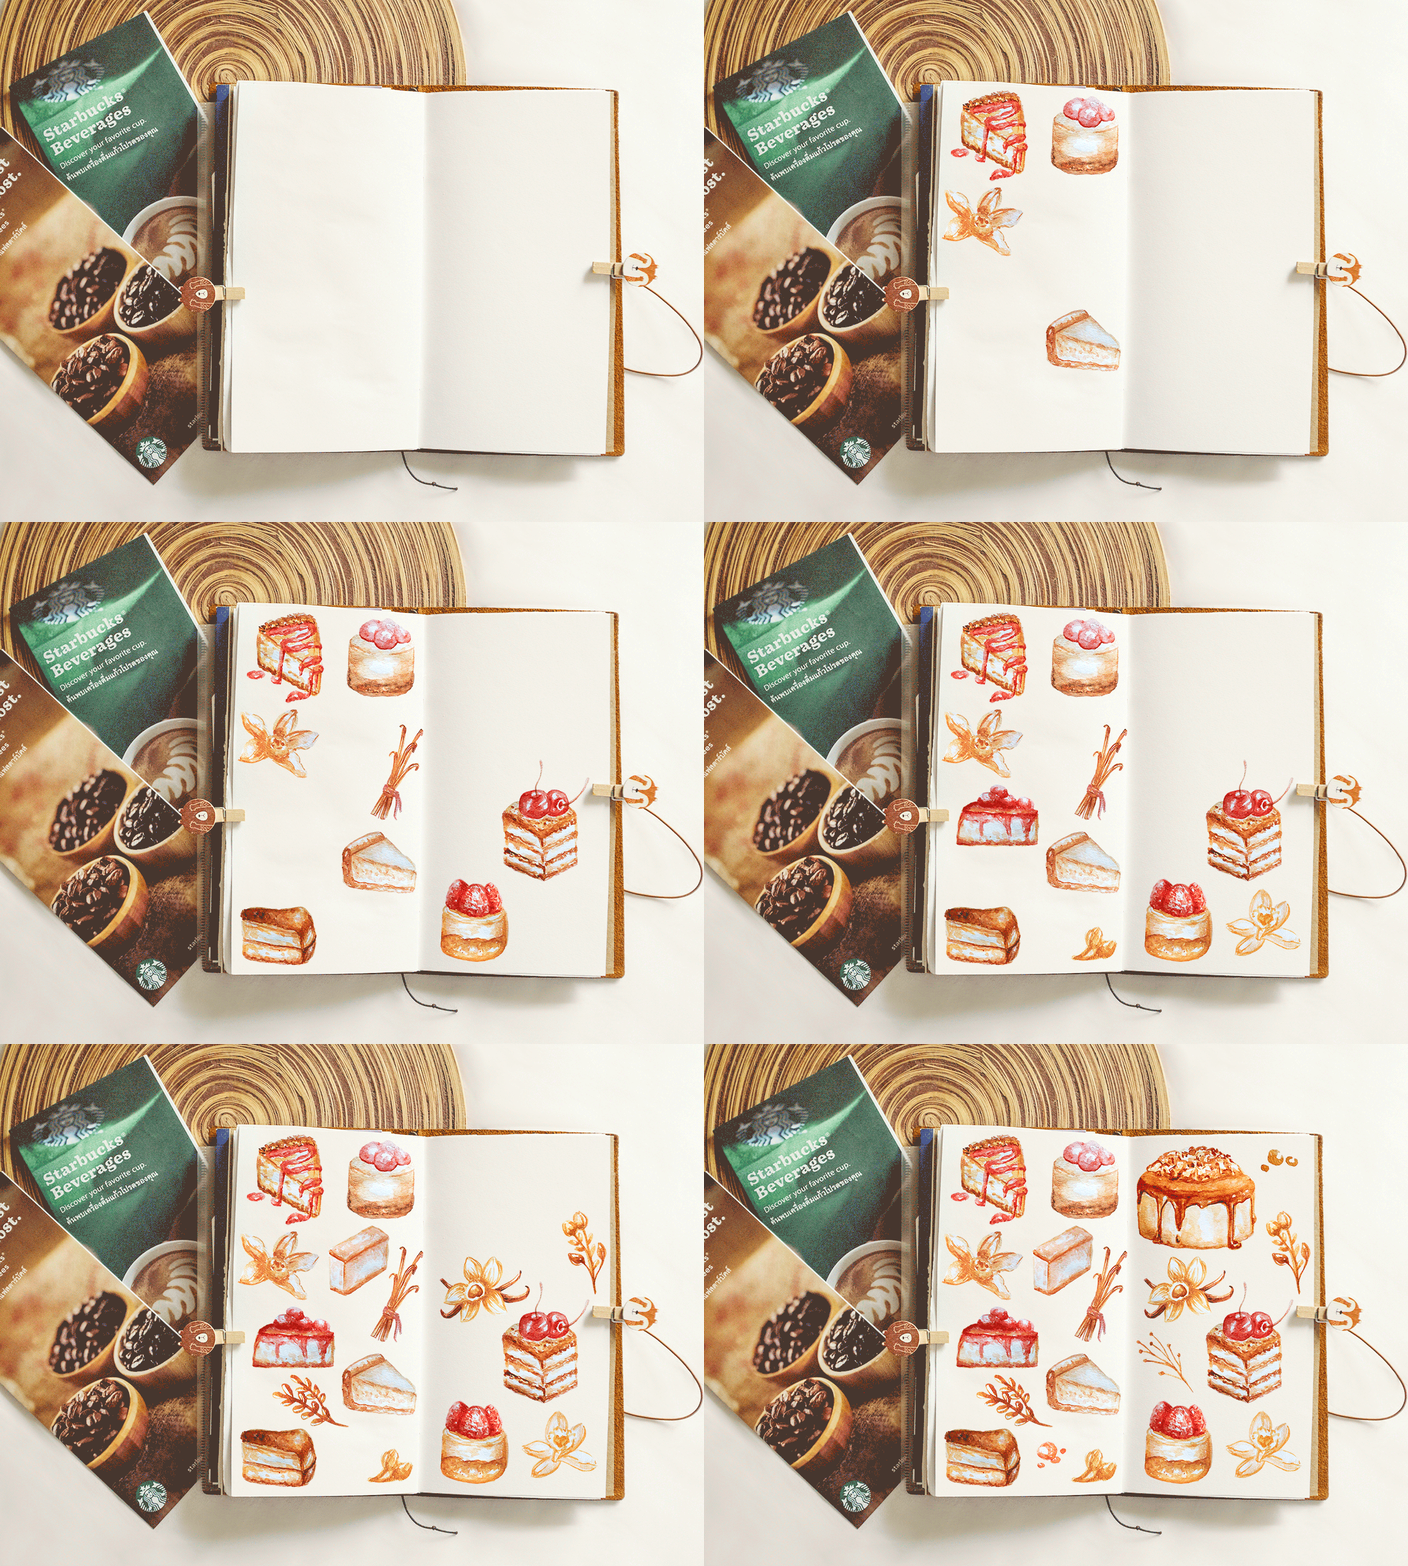
You can purchase this clipart here
Now that we prepared all elements, the fun part begins.
Pattern creation
- Create New Photoshop document (Cmnd + N).
- Make sure that it's a square. I've made the document 1000 px by 1000 px. If you are planning to Print the pattern, it's better to make new document 300 DPI. If you'll use the pattern digitally, 72 DPI will be enough.
Import saved elements to the new document we've created by selecting them in your computer folder and dragging to the Photoshop document. Each illustration will be on the separate layer.
To resize or rotate use Cmnd + T keyboard shortcut.
Use Move tool (V) to move the elements.
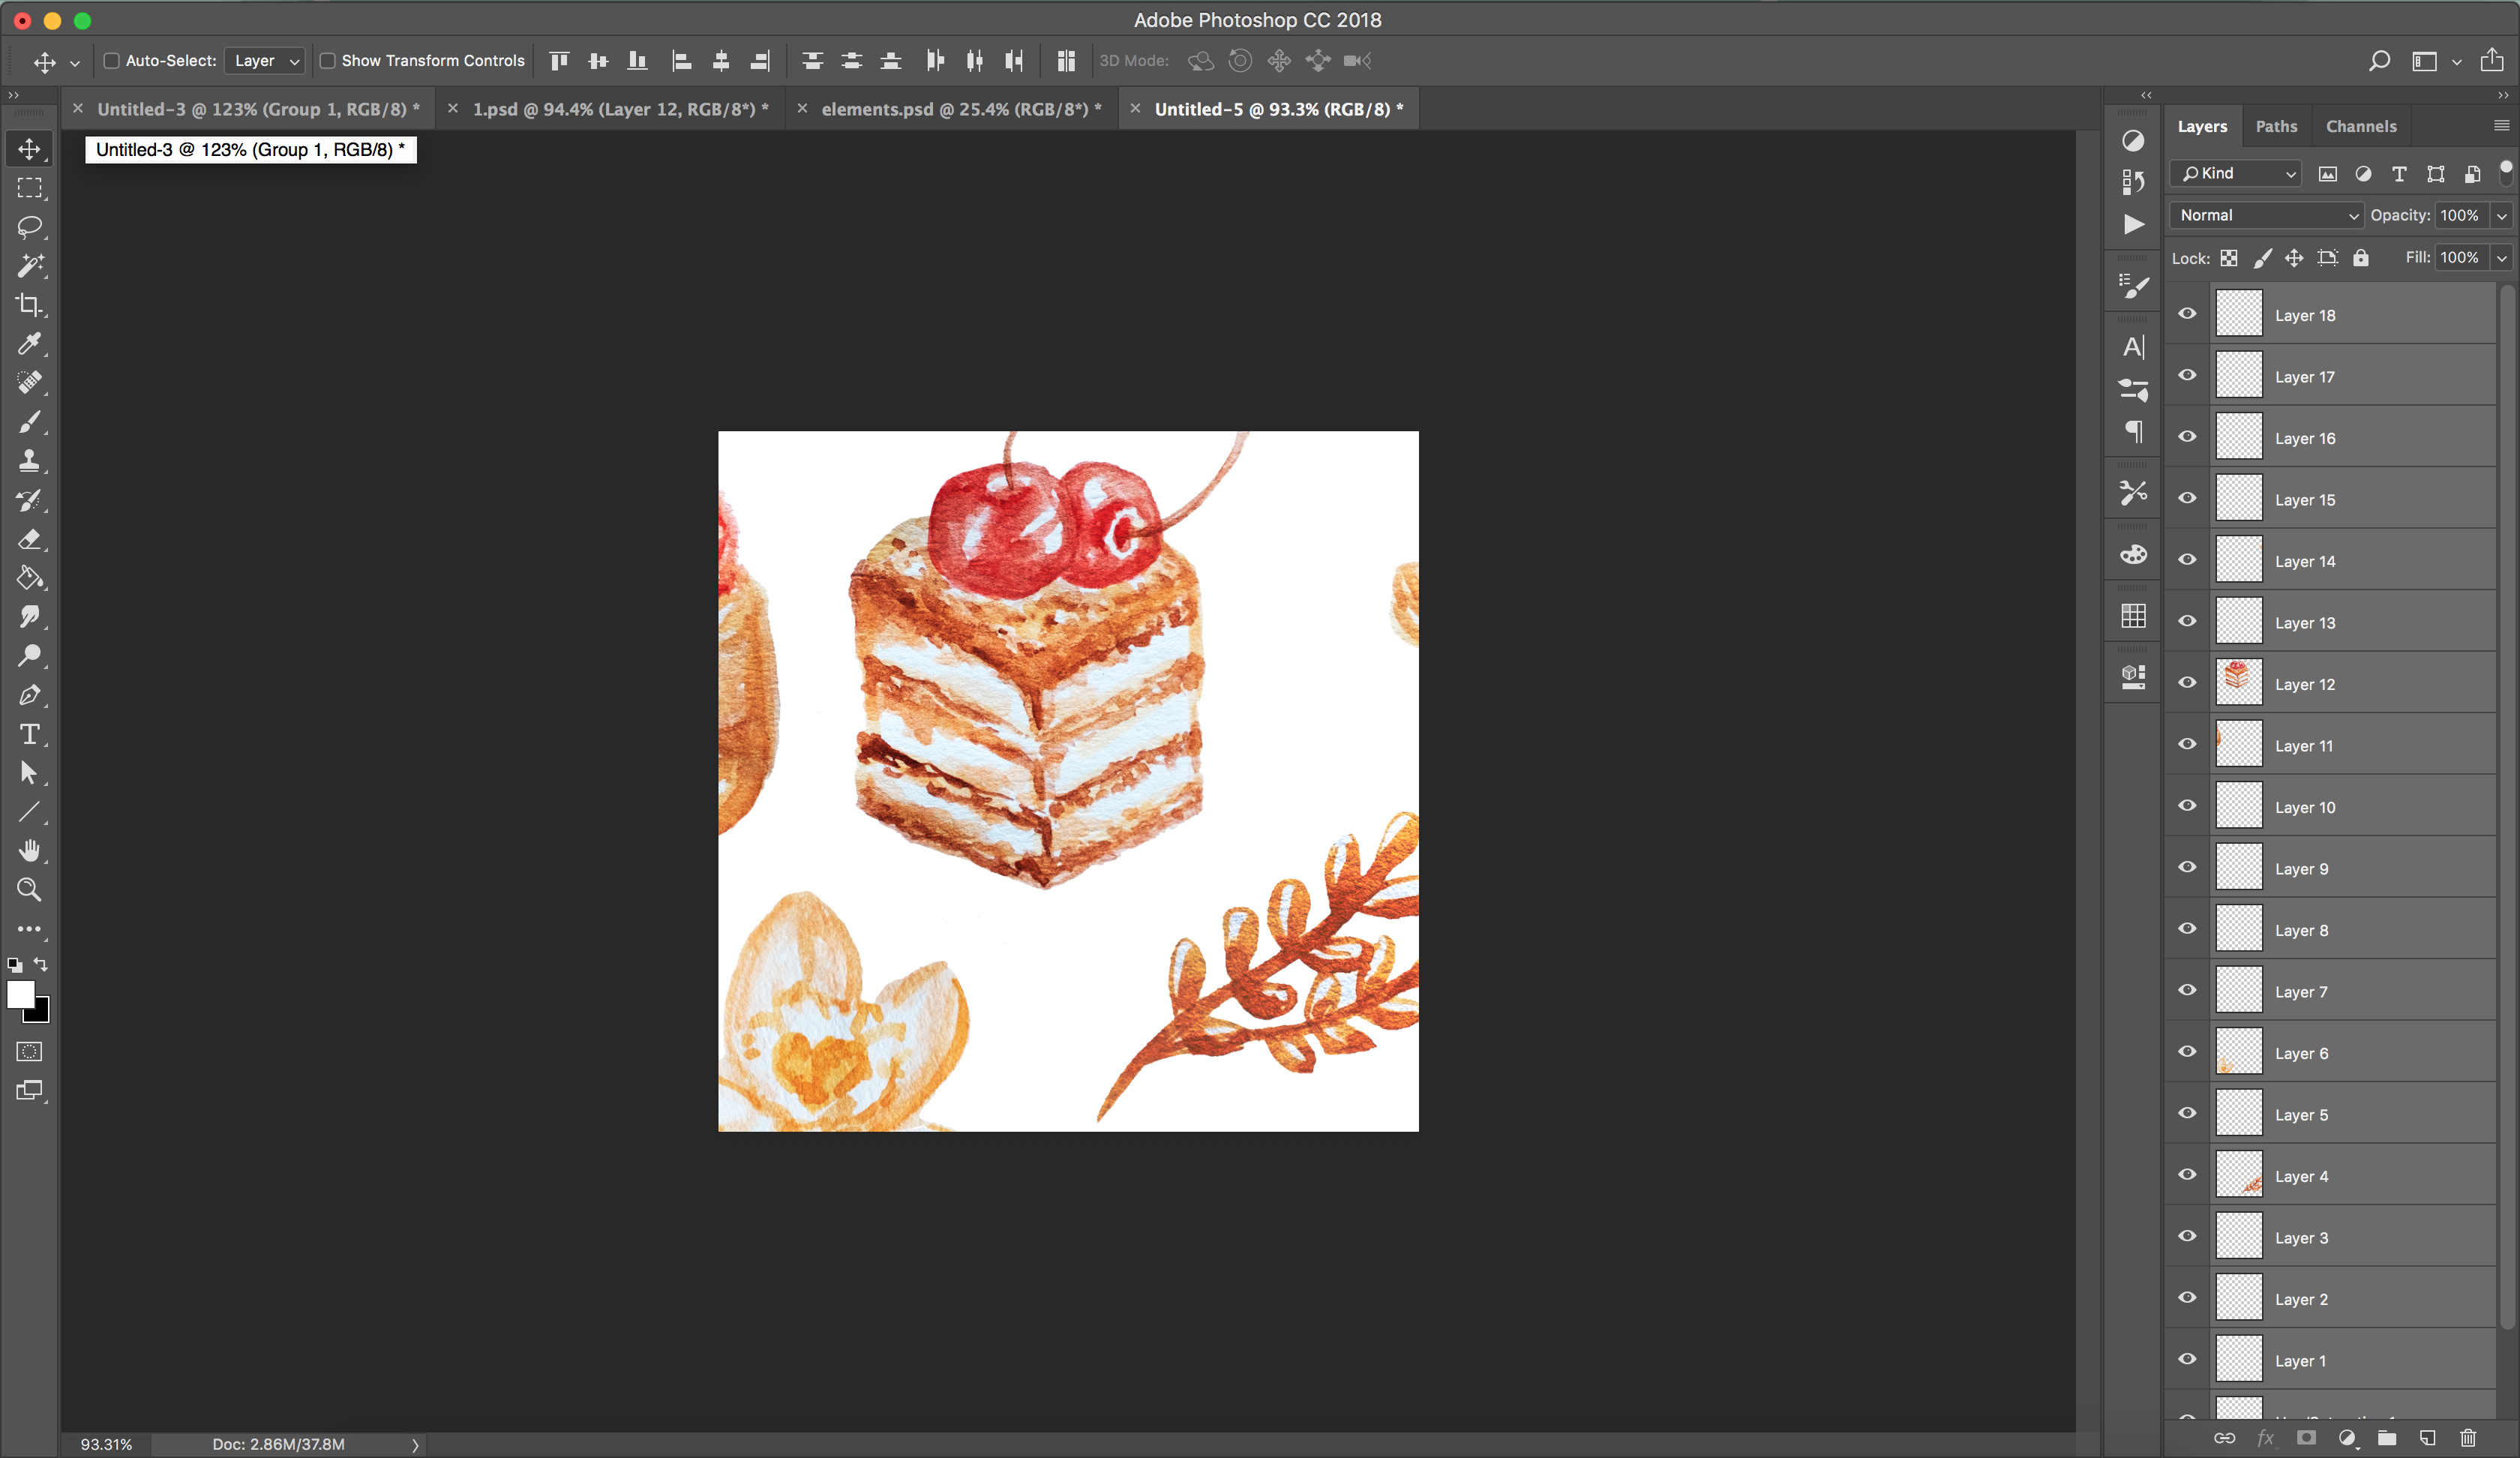
Position the elements as you want.
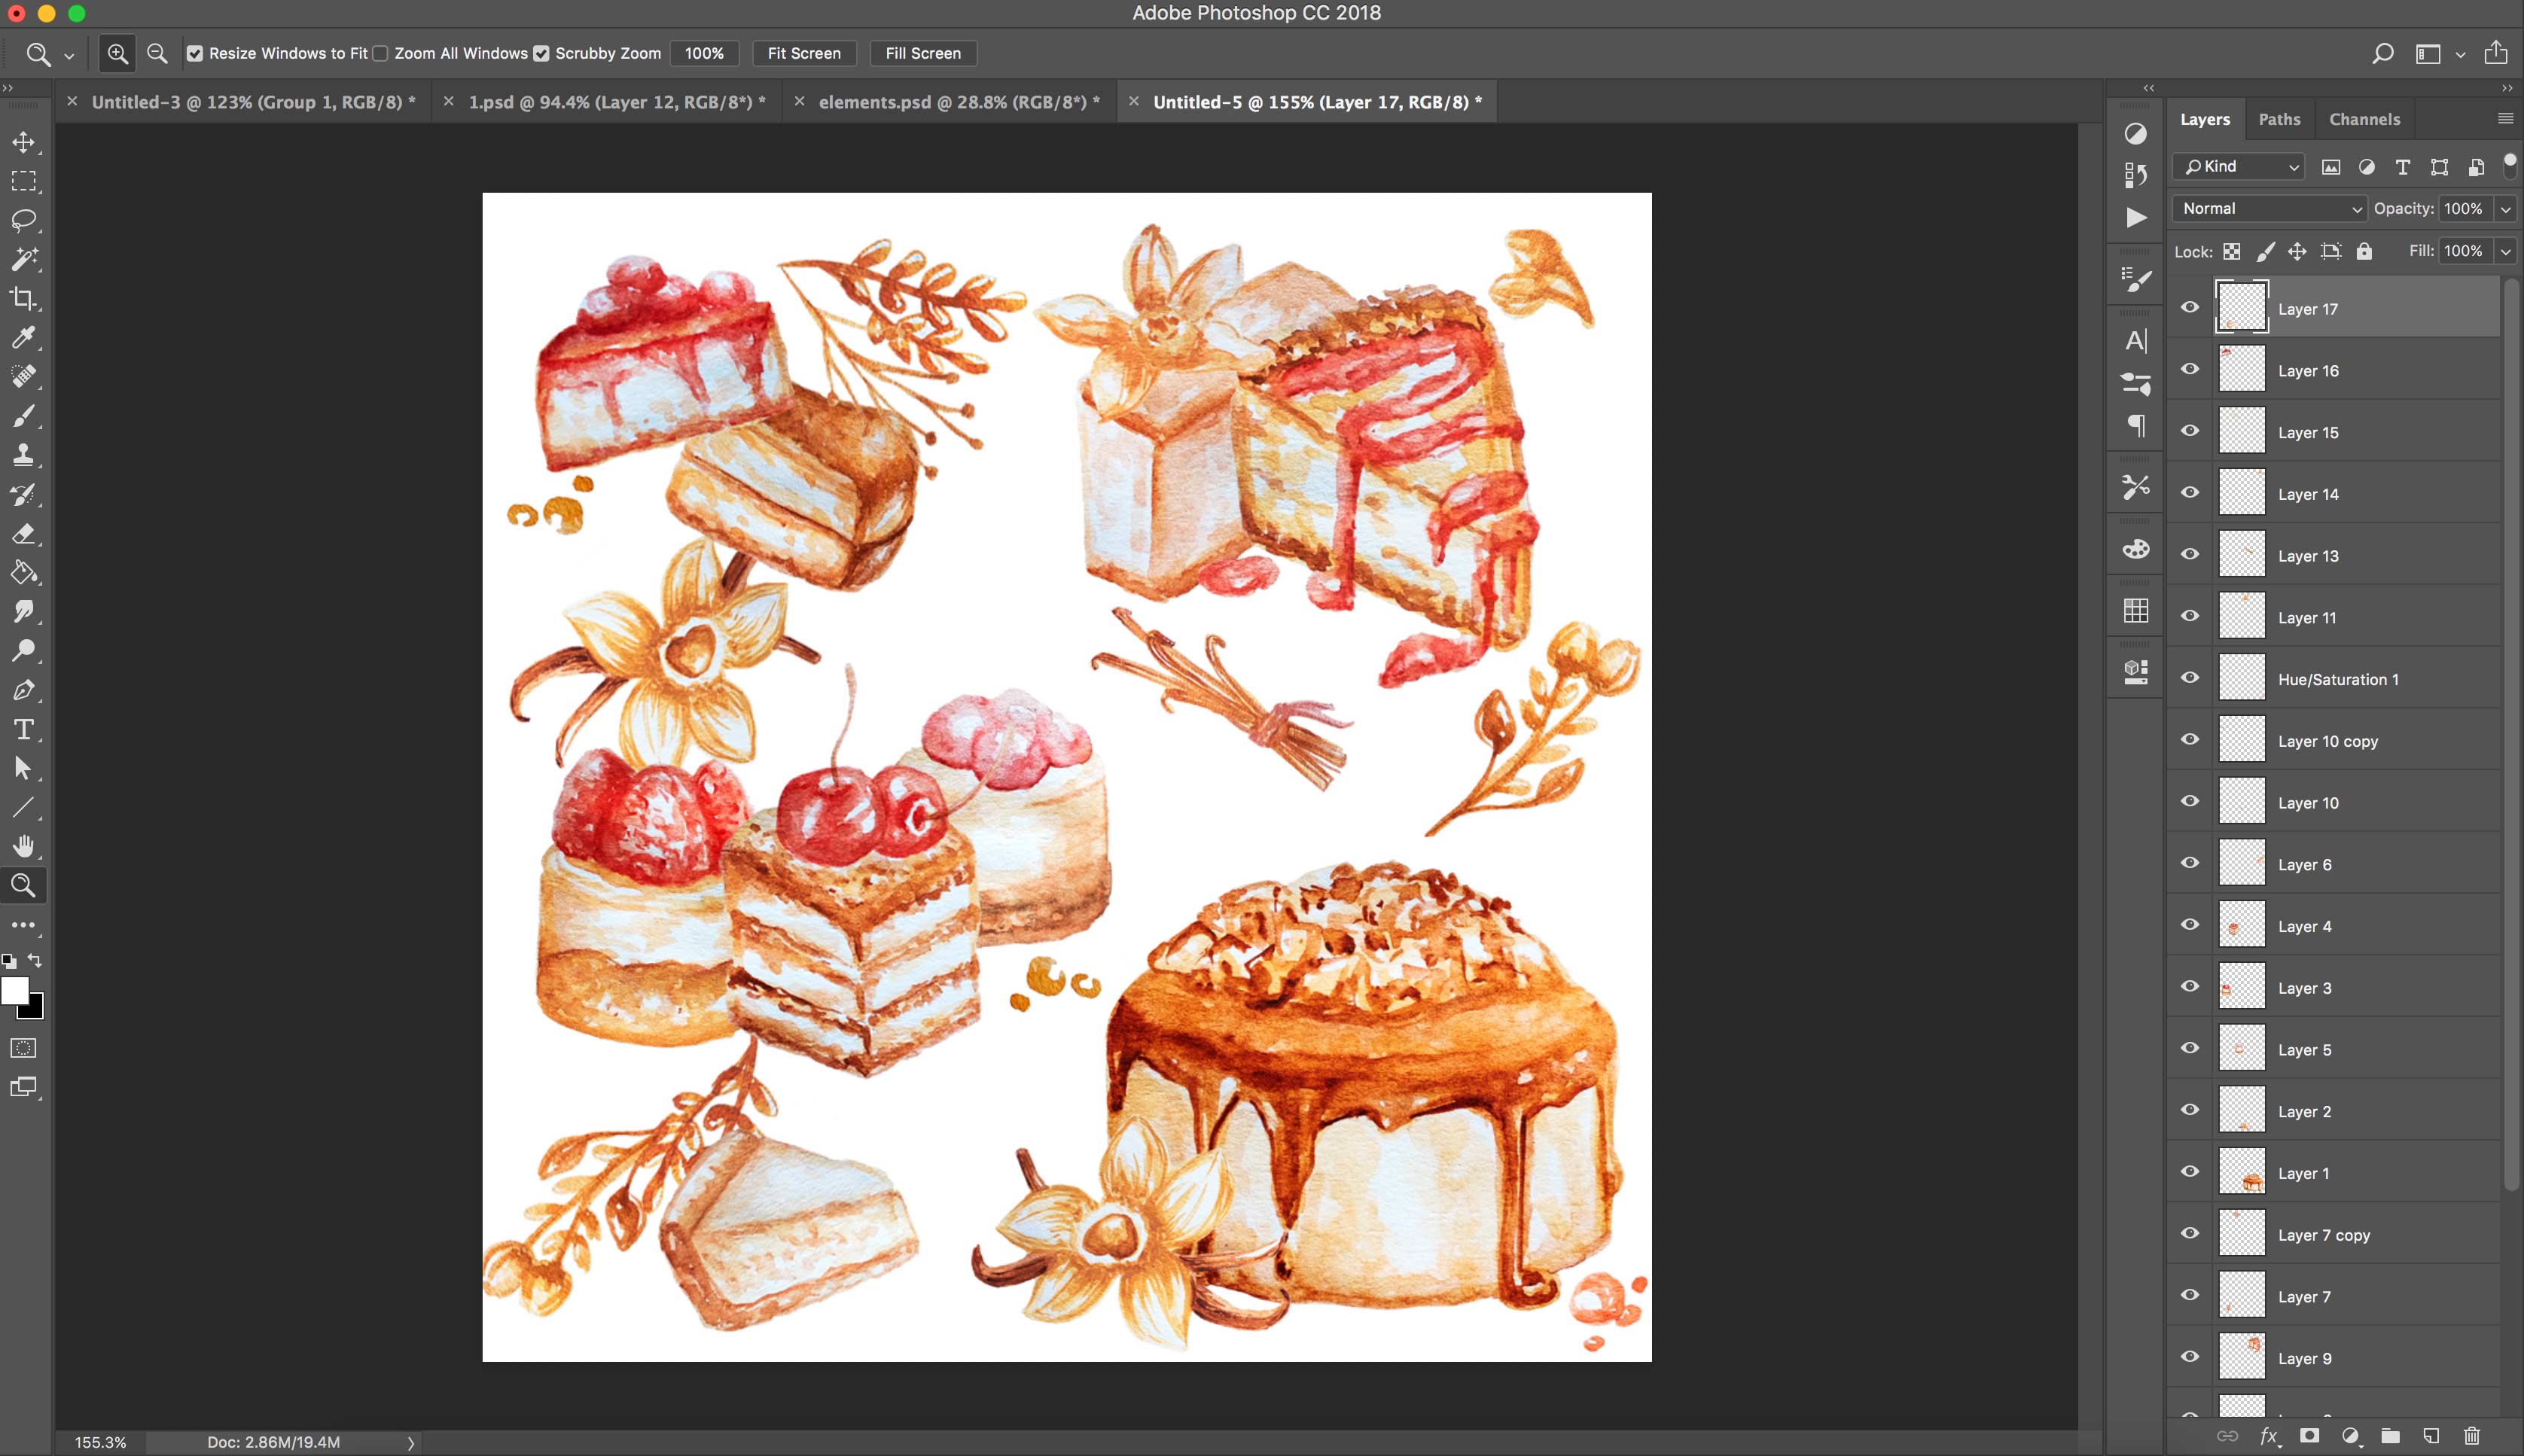
You can also change the background color:
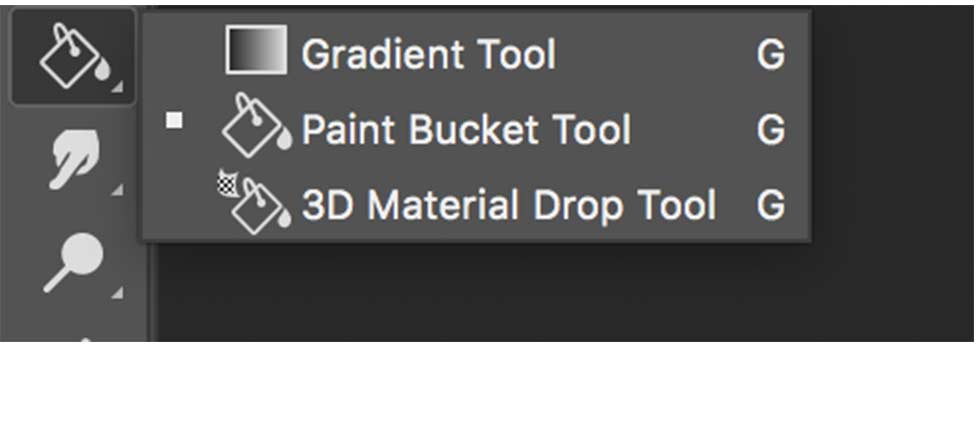
- Go to the layer with color (the first one from the bottom), Select Paint Bucket Tool (G).
- Click on the Color icon and with eyedropper tool select the color you want for the background.
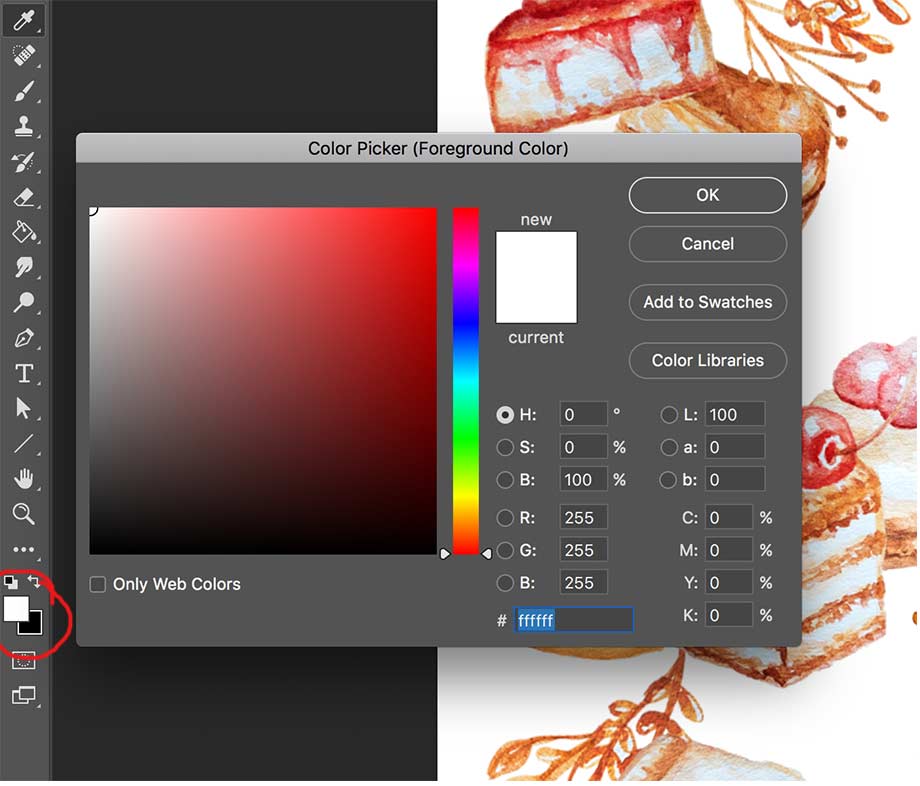
In order for the image to become a seamless pattern, we need to do a couple of things:
1. Merge together elements you'll use as one element. Use Move Tool, Alt + click to select the element, Shift + Alt + click to select another one, Cmnd + E to merge them together. For instance, I have three elements merged together and now they on the one layer instead of three separate layers.
2. Select Rectangular Tool and make selection. Right mouse click - Layer via Cut. This will cut the selection on the new layer. Move right part of the image to the left and left part to the right.
3. Repeat the same steps for other elements. Make sure that there is no space between image and the document edges (otherwise you'll have a line in the middle of your drawing when tileable).
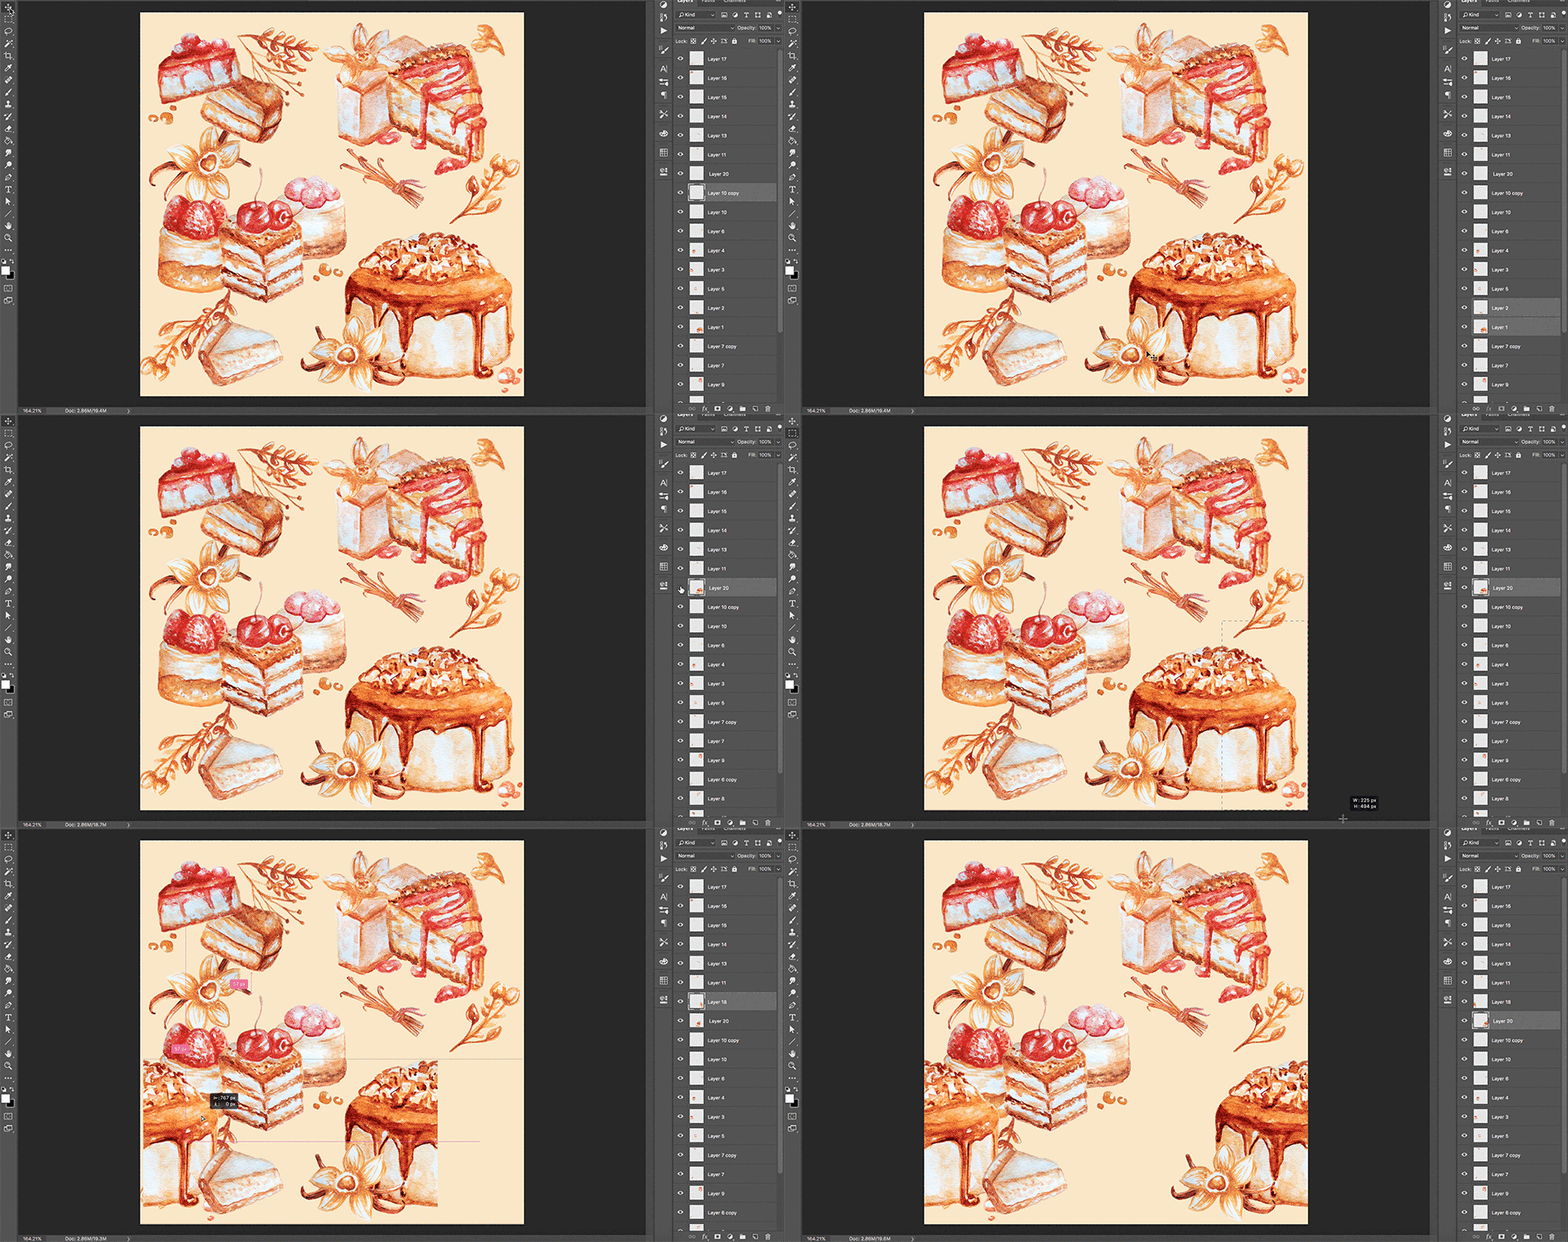
The same technic applies when you need to position elements at the top or bottom.
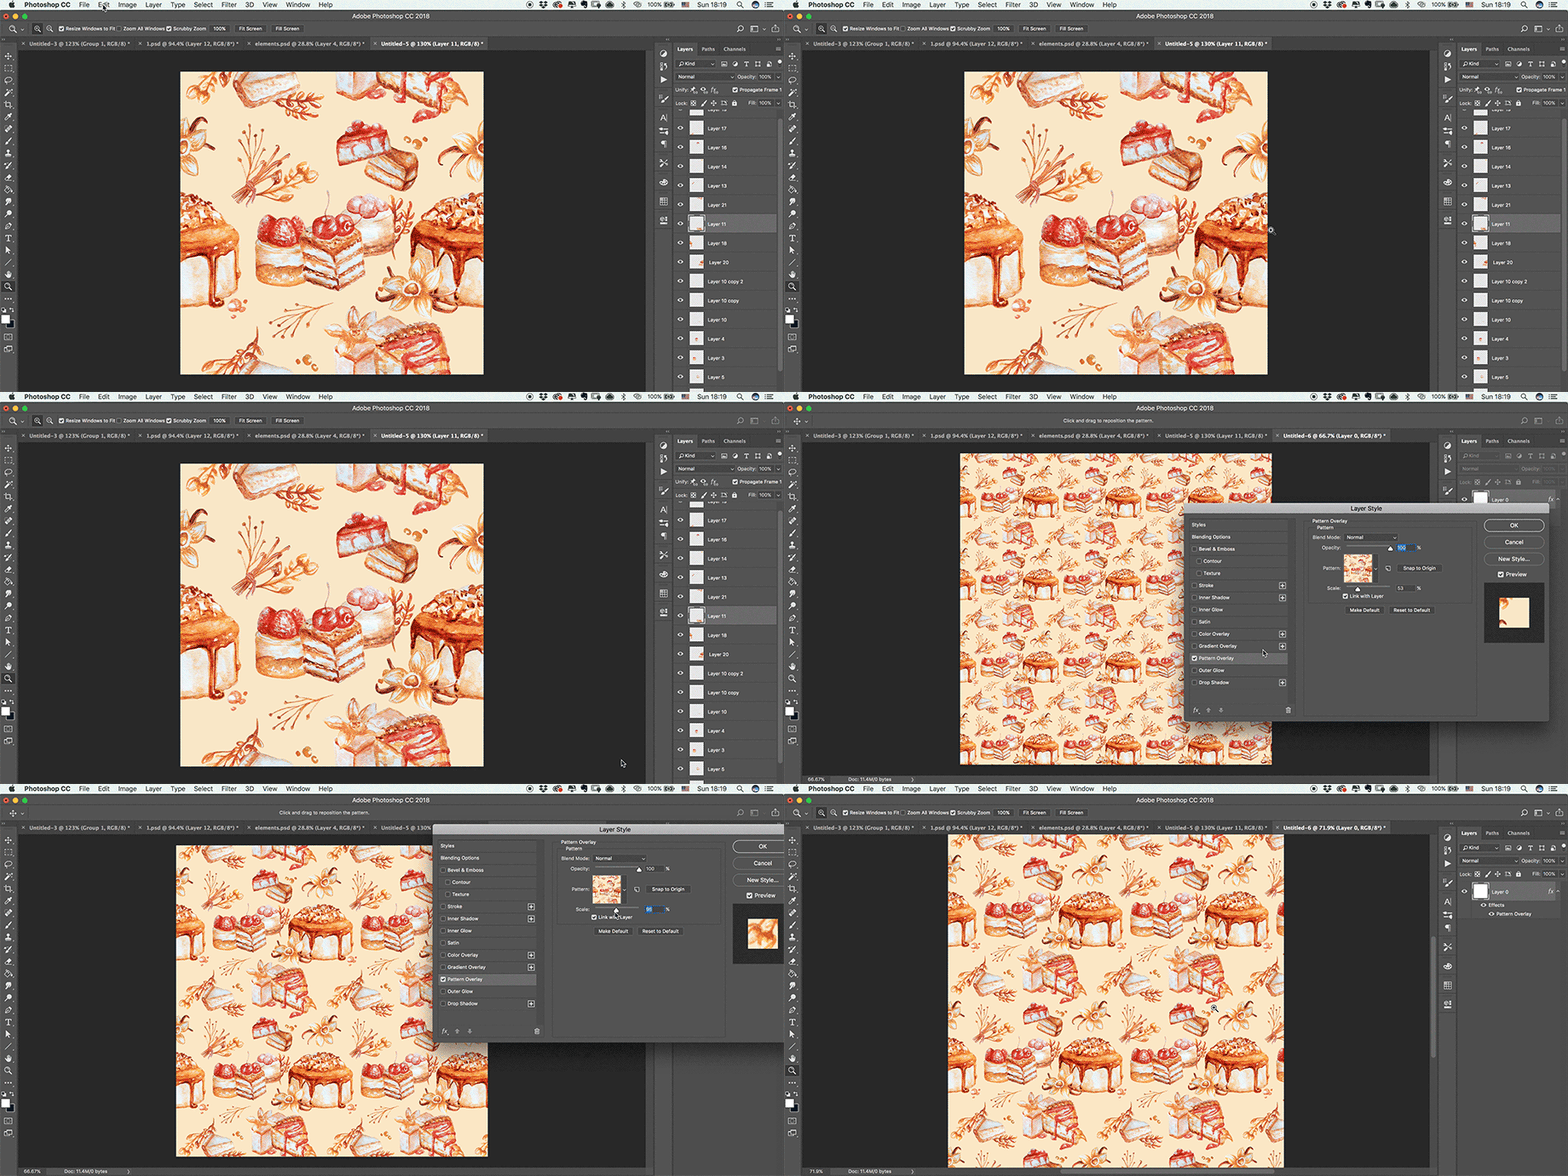
To check how pattern is looking follow those steps:
1. Select Edit - Define Pattern.
2. Create New document (Cmnd + N) (bigger than pattern document).
3. Double click on the background layer to Rasterize it.
4. Double click on the layer to bring Layer Style window.
5. Choose Pattern Overlay and select the pattern. (it'll be the last one).
6. Play around with Scale to adjust the image.
How to apply Gradient to your pattern elements
You can simplify detailed pattern by applying gradient to the elements.
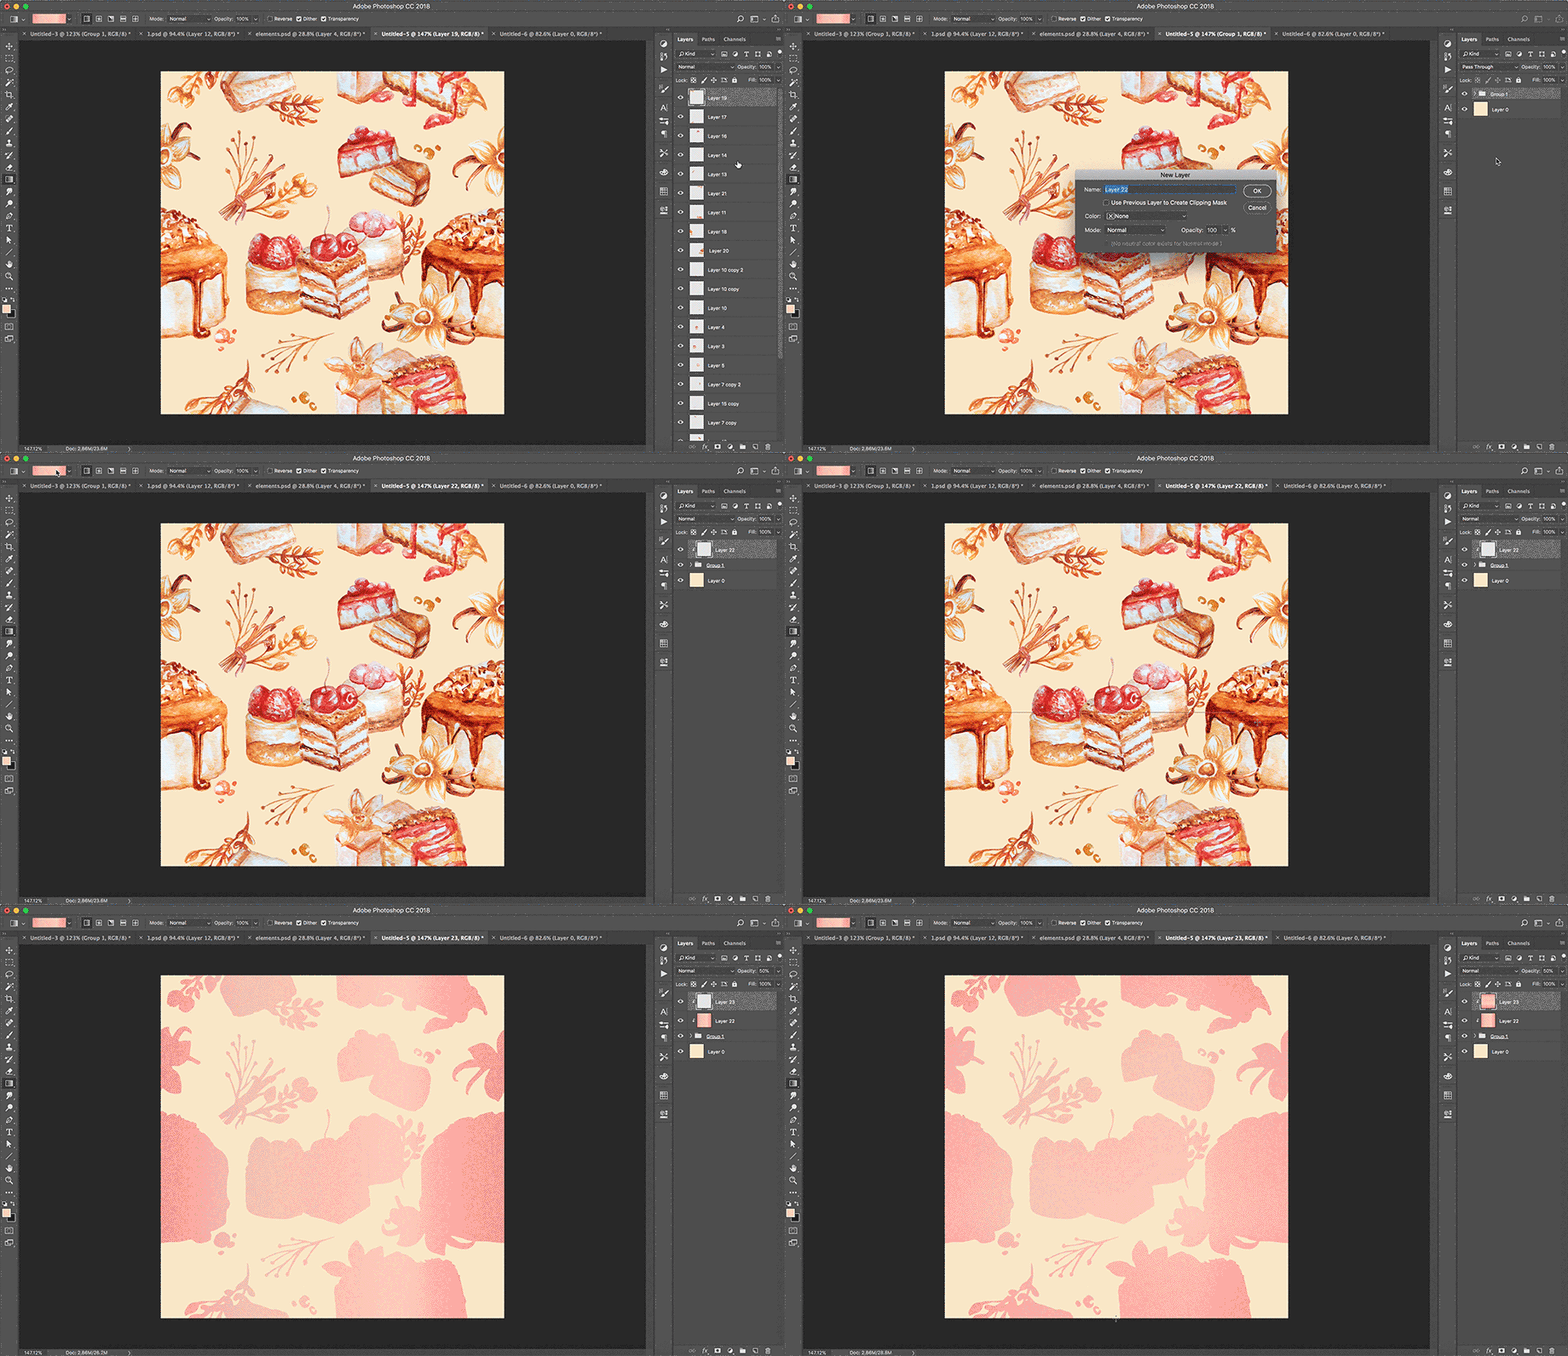
1. Select the first layer and the last layer with elements. Right click - Group from Layers.
2. Create new Layer (Cmnd + Shift + N) and make it a clipping mask to the group by Holding Alt and positioning the cursor between the layers.
3. Select Gradient Tool and choose colors you want to use.
4. Holding Shift draw a straight line from left to right.
5. Create one more new layer, set it's Opacity to 50% and make it a clipping mask as well.
6. Use the same gradient, but this time holding Shift draw a straight line from top to bottom.
To check the gradient, repeat the steps from before: Edit - Define Pattern. Use it on the bigger document we created earlier.
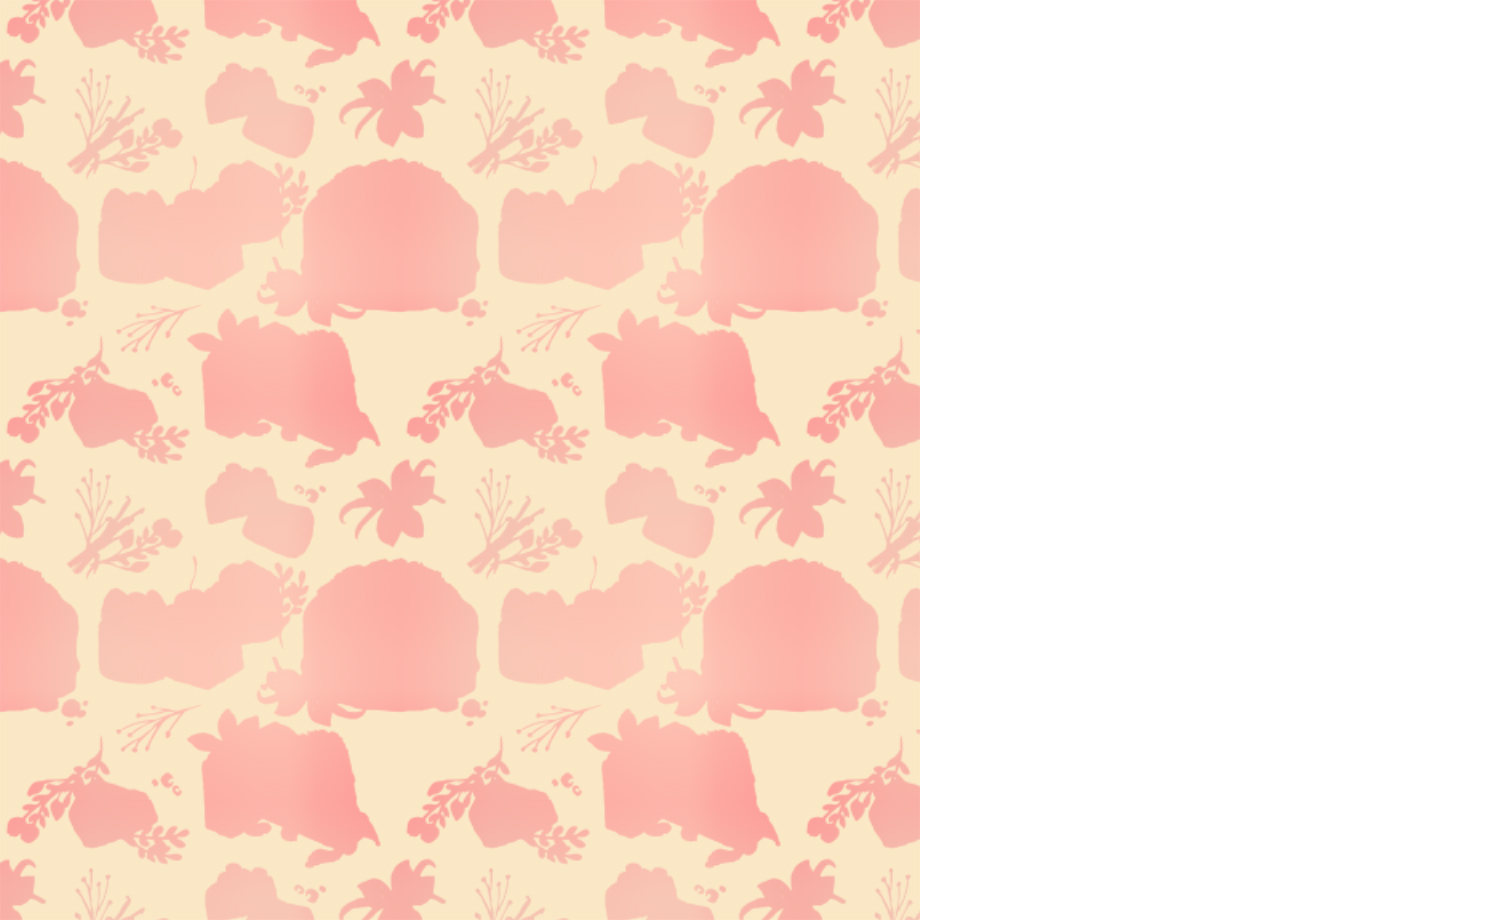
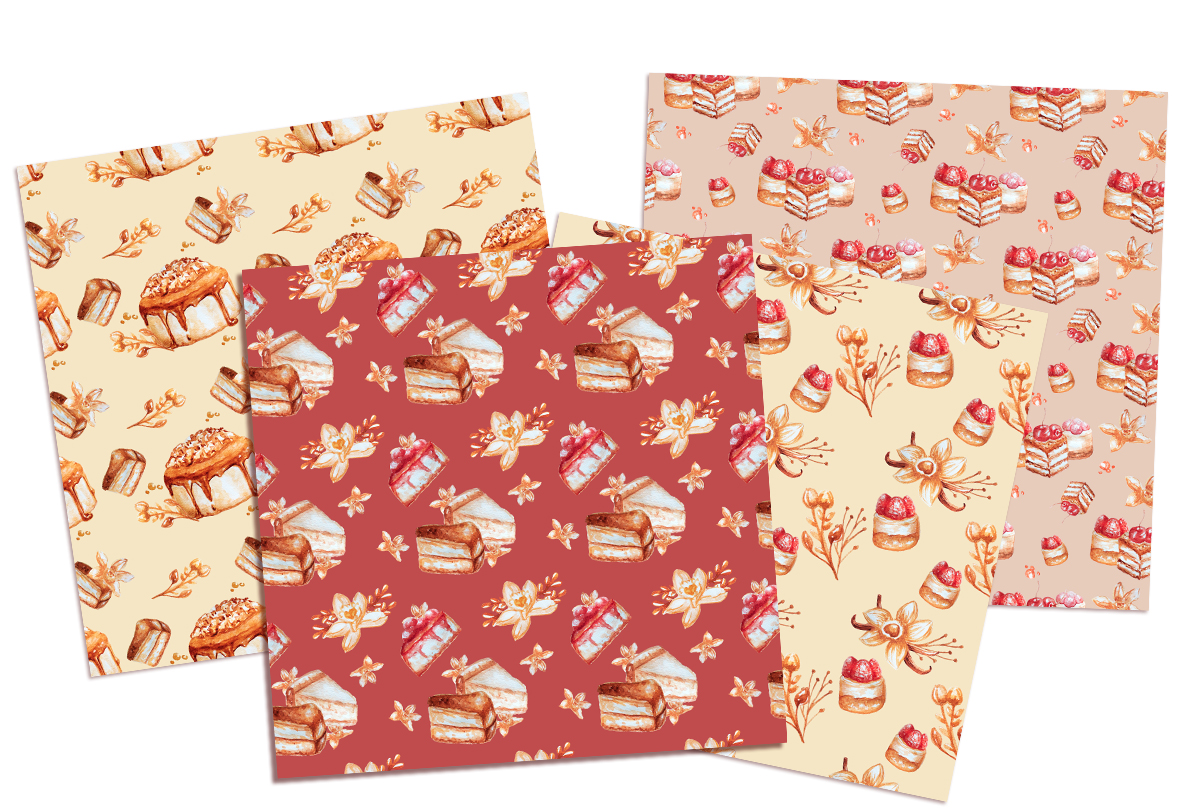
You can make unlimited number of patterns using this technic. The sky is the limit.
Here is some of mine:
Hope this post was helpful. If you have any questions, please feel free to ask in the comments. I always answer :)
Talk to you soon,
Kate